Role-Based Access Control (RBAC)
Note
For more information about managing users, see User Management. For more information about creating and editing API Clients see How to Use the API.
RBAC Overview
Role-based access control (RBAC) allows administrators to restrict read and write access to key parts of Fugue, such as:
Viewing or configuring environments
Accessing compliance, drift, enforcement, or baseline data
Accessing the visualizer
Managing users, groups, custom rules, and API clients
Managing notifications
Running scans
And more
RBAC promotes the principle of least privilege. It’s a security best practice to only give admin access to users who need it, and to limit other users from having unnecessary access to environments and actions.
You can manage RBAC from the Groups page:
For more details, see The Groups Page.
Note
RBAC is a Fugue paid plan feature.
Groups, Policies, Users
Note
If an admin creates a new environment, they need to assign the environment to a group so users or API Clients in that group can access it. See How to Edit Groups.
Three key concepts in RBAC are groups, policies, and users/API Clients.
A group represents a set of environments that users or API Clients can access. Each group is associated with a single policy, which defines the actions that users or API Clients can take in Fugue. Each user or API Client belongs to one or more groups and inherits the policies of each group.
You can view RBAC groups on the Groups page, users on the Users page, API Clients on the API Clients page.
By default, each tenant starts with one group and one user – the Admin group and account owner. The user who created the tenant is the account owner.
How Access is Restricted
Users and API Clients can only access the environments their groups explicitly allow them to access. If a user or an API Client isn’t granted access to an environment, they can’t see it, take action on it, or configure tenant-level settings for it.
For example, Editors can’t view or edit notifications associated with environments they don’t have access to. Likewise, Contributors can only waive rule results in environments they can see.
The Environment Overview page only displays accessible environments, and users will see an error message if they attempt to access an environment via direct URL.
The GET /environments endpoint only returns accessible environments.
Types of Policies
Fugue supports the following policies:
The Admin group has the Admin policy, which cannot be changed. Any other group may be given any policy except Admin. The Admin policy is a Fugue out-of-box policy. To learn more about each policy, see Policy Permissions.
Organization Report Viewer
An Organization Report Viewer grants users access to the tenant and organization-level reports in the root tenant. This policy only displays in the root tenant for an organization. Refer to Organizations for more information.
The Organization Report Viewer policy is useful for non-admin users who want to view root tenant and organization-level reports.
See Policy Permissions for a detailed list of Organization Report Viewer permissions.
IaC Scanner Policy
The IaC Scanner policy grants a user or API Client read-only access to a group’s environments. Users cannot view environments the group doesn’t grant access to, and they can’t perform write actions on any environment except kicking off a scan. (The exception is if they also belong to a group that grants other permissions. See our note here.)
One use case is to use the IaC Scanner policy for kicking off a scan and uploading the results for Fugue Repository environments using regula run --sync --upload.
An IaC Scanner policy grants a user or an API Client:
Read-only access to a group’s environments
Write permissions to kick off a scan
Upload those results to the Fugue Saas (using
regula run --sync --upload)Read-only access to view rules, families, and reports
See Policy Permissions for a detailed list of IaC Scanner permissions.
Read Only Policy
A Read Only policy grants a user or API Client read-only access to a group’s environments. Users cannot view environments the group doesn’t grant access to, and they can’t perform write actions on any environment. (The exception is if they also belong to a group that grants other permissions. See our note here.)
For example, Alice Admin creates a group called Staging. The group is associated with the Read Only policy and enables access to two environments, Web Us-east-1 and Web Us-west-2. Alice assigns the user Bob to Staging, which allows Bob to view only those two environments. Bob cannot edit environment settings, enable/disable enforcement, manage users, and so on; he can only view the environments.
The Read Only policy is most useful for users or API Clients who only need to view compliance data and don’t need to scan or perform write actions on environments.
Users with a Read Only policy can configure one-time and scheduled emails for tenant-level reports on the Reports page, but only for the environments they can access.
See Policy Permissions for a detailed list of Read Only permissions.
Auditor Policy
An Auditor policy grants all the same permissions as a Read Only policy, but also allows the user or API Client to run scans and configure notifications.
The Auditor policy is ideal for compliance analysts or API Clients who don’t necessarily need write access to environments.
See Policy Permissions for a detailed list of Auditor permissions.
Editor Policy
An Editor policy grants all the same permissions as an Auditor policy, but also allows a user or API Client to configure environment settings such as scanned resource types, drift detection, baseline enforcement, etc.
The Editor policy is ideal for users or API Clients who need to edit environments, but not create or delete them.
See Policy Permissions for a detailed list of Editor permissions.
Contributor Policy
A Contributor grants all the same permissions as an Editor policy, but also allows users or API Clients to create environments, configure custom rules, and manage rule waivers.
The Contributor policy is useful for non-admin users or API Clients who require more privileges, such as for managing rules and waivers.
See Policy Permissions for a detailed list of Contributor permissions.
Manager Policy
A Manager grants all the same permissions as a Contributor policy, but also allows users or API Clients to delete environments.
The Manager policy is useful for non-admin users or API Clients who require more privileges, such as deleting environments.
See Policy Permissions for a detailed list of Manager permissions.
Admin Policy
An Admin policy grants a user or API Client read and write access to all environments and all tenant settings. It’s associated with the Admin group, the default group in Fugue. No other group can use the Admin policy.
Administrators can create groups and grant permissions to that group determine the actions, pages, and environments that users can view, access, or edit within Fugue.
The Admin policy cannot be modified, but users or API Clients in the Admin group can be moved to another group – except the account owner, who cannot be reassigned. To change the account owner, contact support@fugue.co.
See Policy Permissions for a detailed list of Admin permissions.
RBAC Policy Permissions
Fugue supports assigning of RBAC Policies to groups, which can be assigned to users or API Clients.
UI Policy Permissions
Note
Scroll to the right to view the entire table.
Feature |
Organization Report Viewer |
IAC Scanner |
Read |
Auditor |
Editor |
Contributor |
Manager |
Admin |
|---|---|---|---|---|---|---|---|---|
Environments |
||||||||
View Environments |
X |
X |
X |
X |
X |
X |
X |
|
Create Environments |
X |
X |
X |
|||||
Edit Environments |
X |
X |
X |
X |
||||
Delete Environments |
X |
X |
||||||
Run Scans on an Environment |
X |
X |
X |
X |
X |
X |
||
Reporting |
||||||||
View, Download, and Export Tenant Reports |
X |
X |
X |
X |
X |
X |
X |
X |
Enable/Disable Compliance Report Emails |
X |
X |
X |
X |
||||
View, Download, and Export Organization-level Reports |
X |
X |
||||||
Rules |
||||||||
View Rules Page |
X |
X |
X |
X |
X |
X |
X |
|
Create, Edit, and Delete Rules |
X |
X |
X |
|||||
Enable/Disable Rules |
X |
X |
||||||
View Waivers |
X |
X |
X |
X |
X |
X |
X |
|
Create, Edit, Delete a Rule Waiver (One Environment) |
X |
X |
X |
|||||
Create, Edit, Delete a Rule Waiver (All Environments) |
X |
|||||||
Create, Edit, and Delete Custom Rule Families |
X |
|||||||
Families |
||||||||
View Families |
X |
X |
X |
X |
X |
X |
X |
|
Create, Edit, and Delete Families |
X |
|||||||
Notifications |
||||||||
View Notifications |
X |
X |
X |
X |
X |
|||
Create, Edit, and Delete Notifications |
X |
X |
X |
X |
X |
|||
API Client, Group, and User Management |
||||||||
View Users/Groups/API Clients Pages |
X |
|||||||
Create and Delete API Clients |
X |
|||||||
Generate and Revoke API Client Secrets |
X |
|||||||
Create, Edit, and Delete Groups |
X |
|||||||
Create, Edit, and Delete Users |
X |
|||||||
API Policy Permissions
Note
Scroll to the right to view the entire table.
Feature |
Org Report Viewer |
IAC Scanner |
Read |
Auditor |
Editor |
Contributor |
Manager |
Admin |
|---|---|---|---|---|---|---|---|---|
Environments |
||||||||
GET /environments |
X |
X |
X |
X |
X |
X |
X |
|
GET /environments/:environment_id |
X |
X |
X |
X |
X |
X |
X |
|
POST /environments |
X |
X |
X |
|||||
PATCH /environments |
X |
X |
X |
X |
||||
DELETE /environments |
X |
X |
||||||
Scans |
||||||||
GET /scans |
X |
X |
X |
X |
X |
X |
X |
|
GET /scans/:scan_id |
X |
X |
X |
X |
X |
X |
X |
|
GET /scans/:scan_id/compliance_by_rules |
X |
X |
X |
X |
X |
X |
X |
|
GET /scans/:scan_id/compliance_by_resource_types |
X |
X |
X |
X |
X |
X |
X |
|
POST /scans |
X |
X |
X |
X |
X |
X |
||
Custom Rules |
||||||||
GET /rules |
X |
X |
X |
X |
X |
X |
X |
|
GET /rules/active |
X |
X |
X |
X |
X |
X |
X |
|
GET /rules/:rule_id |
X |
X |
X |
X |
X |
X |
X |
|
POST /rules |
X |
X |
X |
|||||
POST /rules/test |
X |
X |
X |
|||||
PATCH /rules/:rule_id |
X |
X |
X |
|||||
DELETE /rules/:rule_id |
X |
X |
X |
|||||
GET /rules/test/input |
X |
|||||||
Families |
||||||||
GET /families |
X |
X |
X |
X |
X |
X |
X |
|
GET /families/:family_id |
X |
X |
X |
X |
X |
X |
X |
|
POST /families |
X |
|||||||
PATCH /families/:family_id |
X |
|||||||
DELETE /families/:family_id |
X |
|||||||
Notifications |
||||||||
GET /notifications |
X |
X |
X |
X |
X |
|||
POST /notifications |
X |
X |
X |
X |
X |
|||
PUT /notifications/:notification_id |
X |
X |
X |
X |
X |
|||
Delete /notifications/:notification_id |
X |
X |
X |
X |
X |
|||
Waivers |
||||||||
GET /rule_waivers |
X |
X |
X |
X |
X |
|||
GET /rule_waivers/:rule_waiver_id |
X |
X |
X |
X |
X |
|||
POST /rule_waivers |
X |
X |
X |
|||||
PATCH /rule_waivers/:rule_waiver_id |
X |
X |
X |
|||||
DELETE /rule_waivers/:rule_waiver_id |
X |
X |
X |
|||||
Audit Log |
||||||||
GET /audit_log/events |
X |
|||||||
Events |
||||||||
GET /events |
X |
X |
||||||
User, Group, and Invite Management |
||||||||
GET /users |
X |
|||||||
GET /users/:user_id |
X |
|||||||
GET /groups |
X |
|||||||
POST /groups/:group_ids |
X |
|||||||
PATCH /users/:user_ids |
X |
|||||||
GET /invites |
X |
|||||||
GET /invites/:invite_id |
X |
|||||||
POST /invites |
X |
|||||||
Permissions for Users in Multiple Groups
When a user or an API Client is in more than one group, the permissions are combined in this way:
Environments:
The user or API Client is given access to all environments in a group according to the policy of that group.
If an environment is in multiple groups, the user or API Client can access it at the most permissive level granted.
Tenant settings:
A user or an API Client has access to tenant-level settings according to the most permissive level granted.
For example, suppose you have two groups:
The Read Only Group has the Read Only policy and allows access to Environment A and Environment B.
The Contributor Group has the Contributor policy and allows access to Environment B and Environment C.
A user or an API Client in both groups has the following access:
Read Only access to Environment A
Contributor access to Environment B (because the highest level of permission takes effect)
Contributor access to Environment C
Contributor access to tenant-level settings (e.g., the Custom Rules page)
As a general rule of thumb, the highest level of permissions granted takes effect.
Getting Started with RBAC
The admin should create one or more groups with non-Admin policies to limit what actions users can take and what environment(s) they can view within Fugue.
Here are the basics of RBAC with Fugue:
Create a group to enable access to one or more environments.
Assign existing users or new users to a group.
Optionally, edit a group by changing the environments associated with it.
Delete a group if needed.
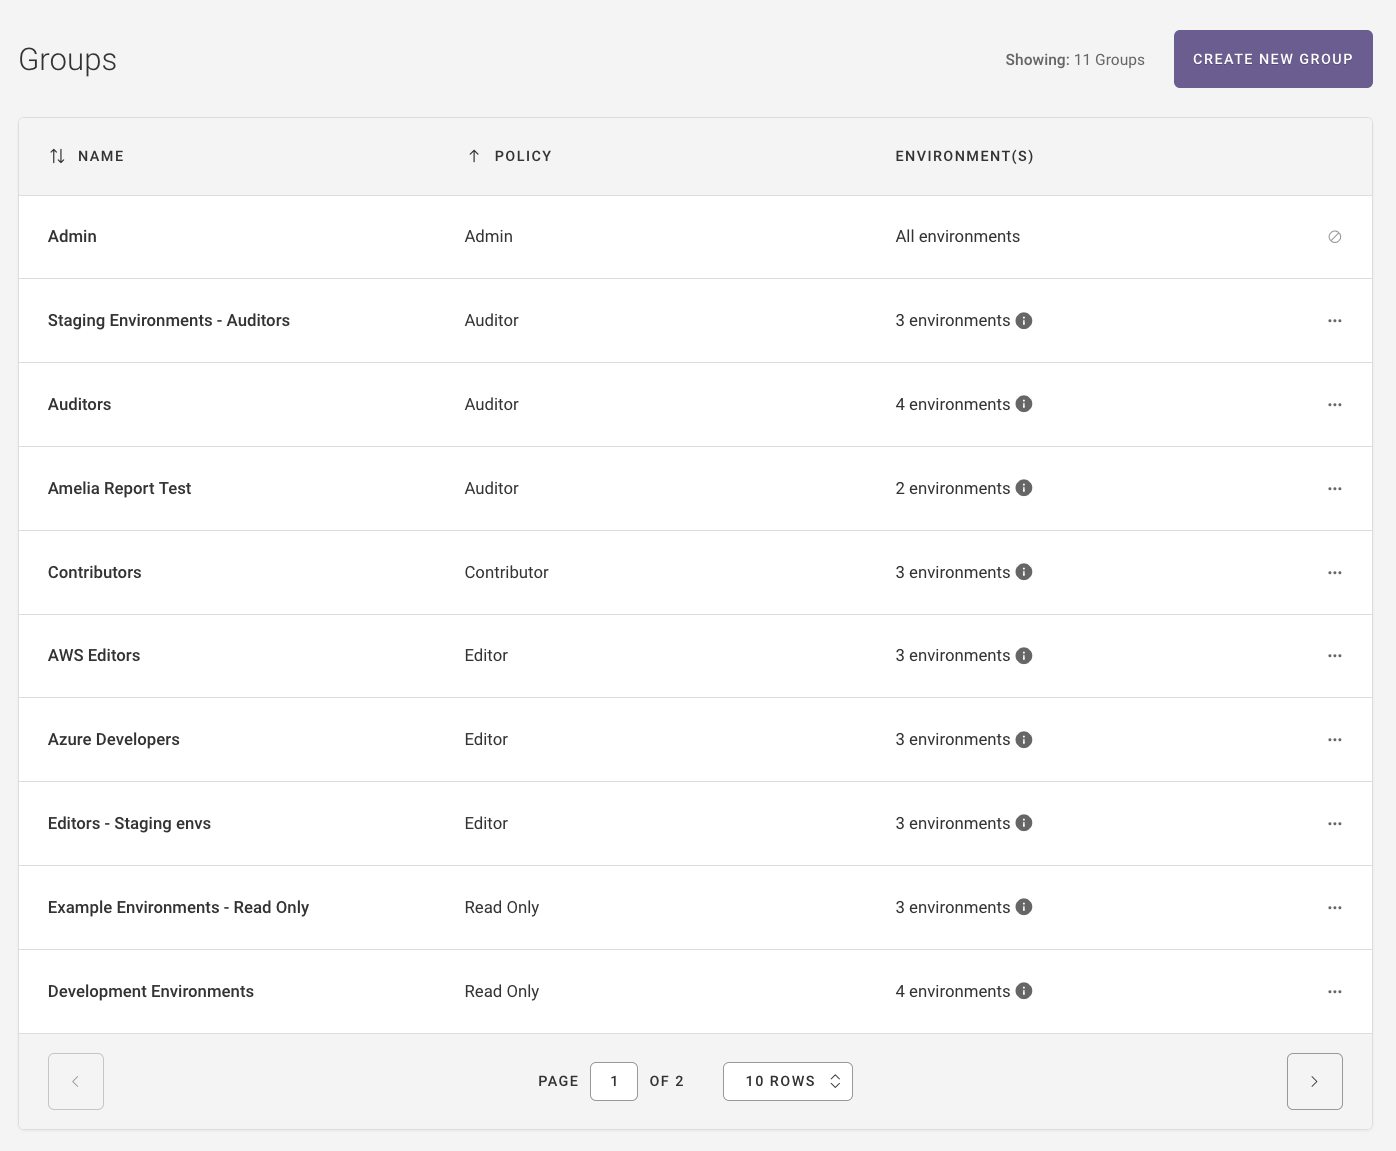
The Groups Page
The Groups page lists the name, policy, and environment(s) associated with each group:
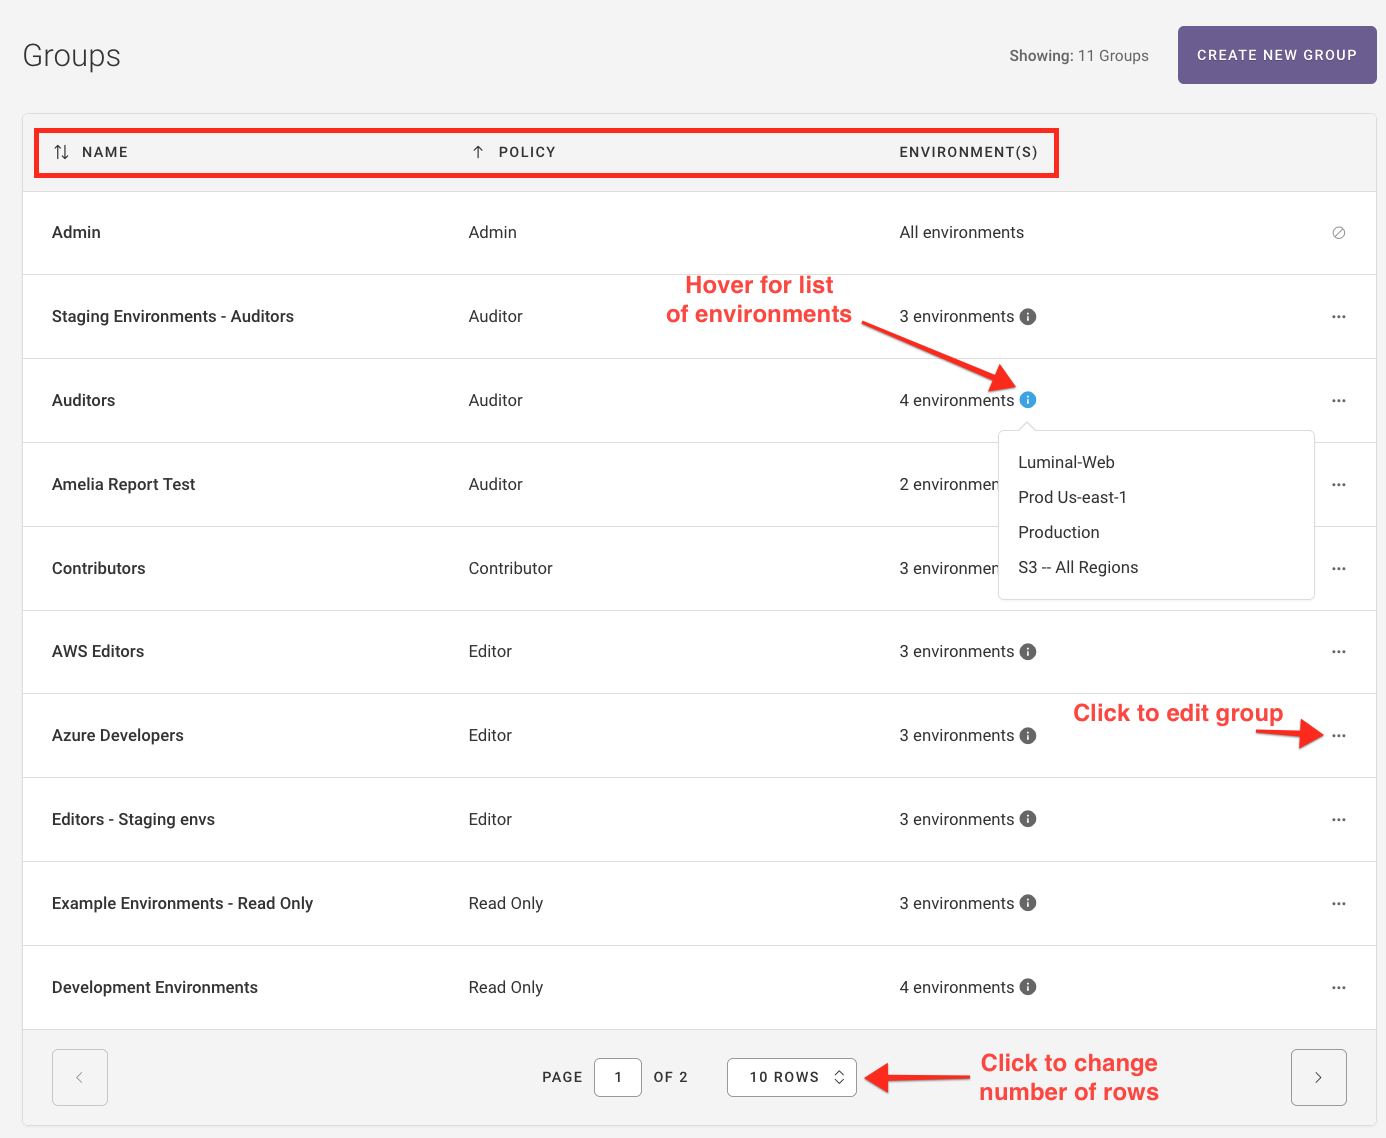
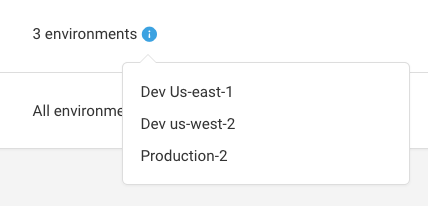
You can hover over the i symbol next to the number of environments in a group to see the environment names:
You can also select the ellipsis ... to edit a group.
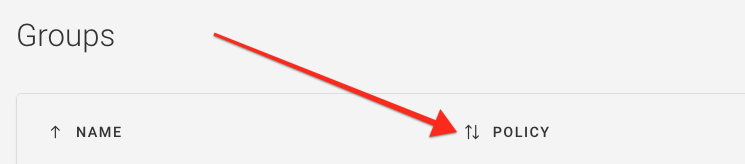
You can sort the table by group name or policy, in alphabetical or reverse alphabetical order. By default, groups are sorted by name in alphabetical order.
The active sorted category shows a single arrow. Select the arrow to reverse the direction.
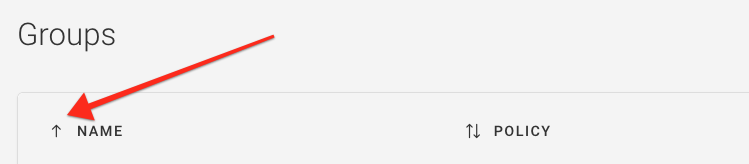
The inactive category shows a double arrow. Select the double arrow to make it active.
If you have more than 10 groups, you’ll see a dropdown menu below the table of groups. You can choose to show 10, 20, 50, or 100 rows per page:

How to Create a Group
There are two steps to creating a group:
Step 1: Definition
Click the Create New Group button.
Enter a name for your group.
In the Policy drop-down, select the policy to be associated with the group.

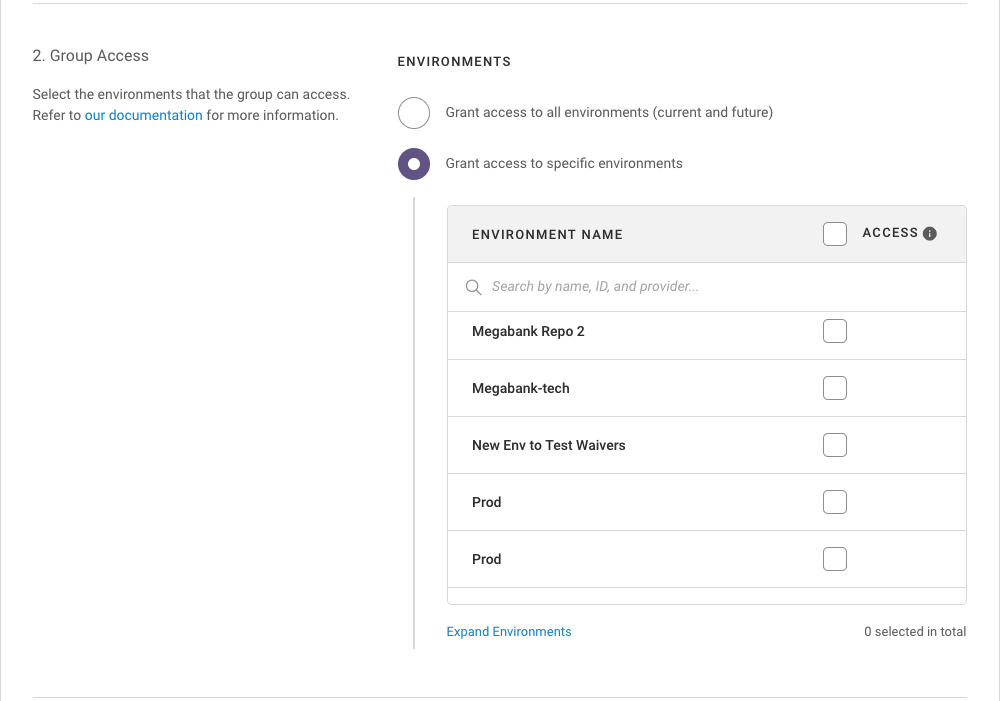
Step 2: Environments
Select the environments this group can access. You can select all environments (current or future) or you can search for specific environments by environment name, environment ID, or cloud provider. Multiple search terms are supported – just use the
Tabkey after each term. UseEnterto search.Click Create Group.
Note
Additionally, if you do not create any groups, all users will belong to the Admin group and they will have global access to everything within Fugue.
How to Assign Existing Users to Groups
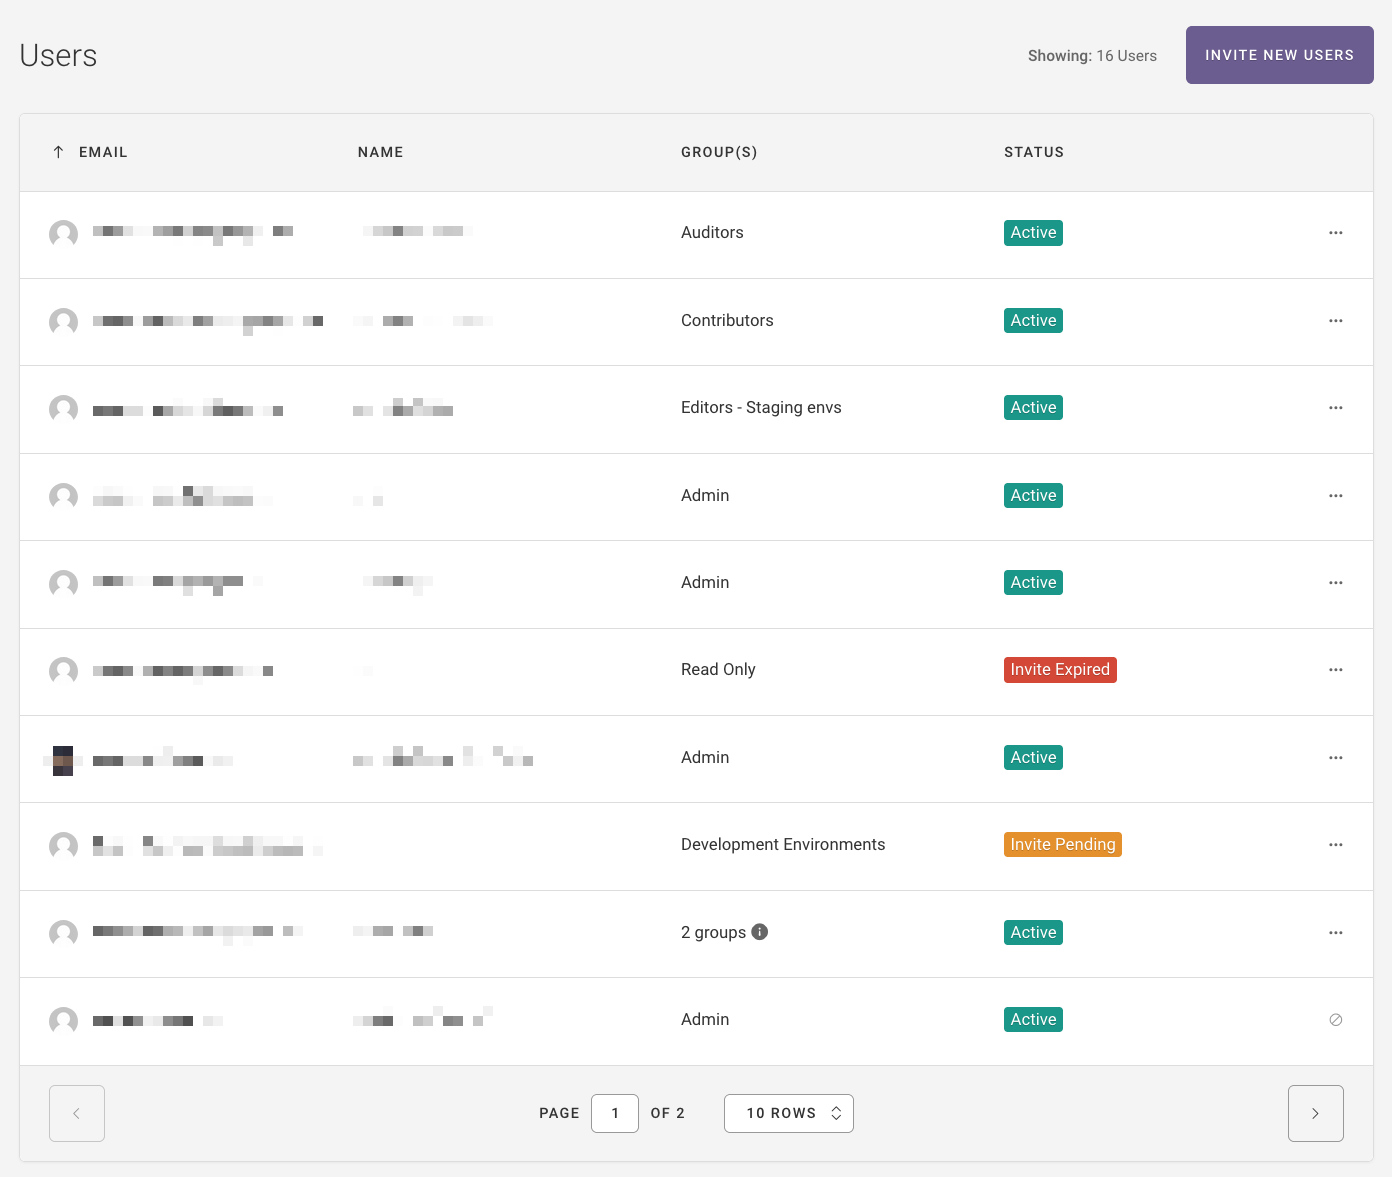
2. In the user row, select the ellipsis icon ... and choose Edit User.

3. Select the group(s) you want the user to belong to.
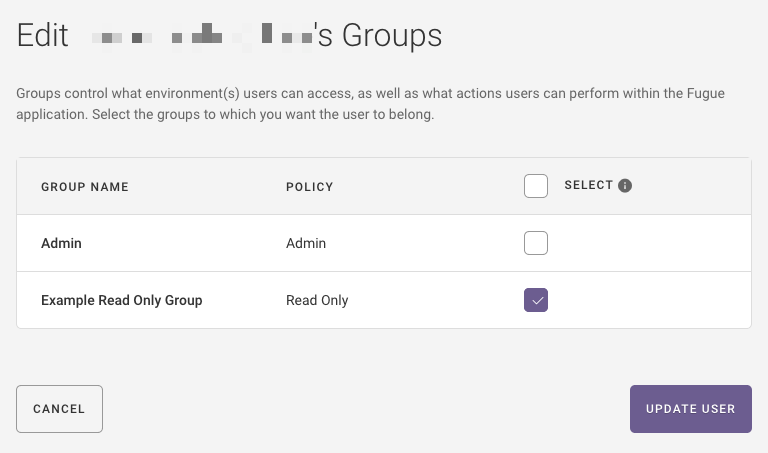
4. Click Update User.
How to Invite and Assign New Users to Groups
Click the Invite New User button.
Select the group(s) you want the user to belong to.
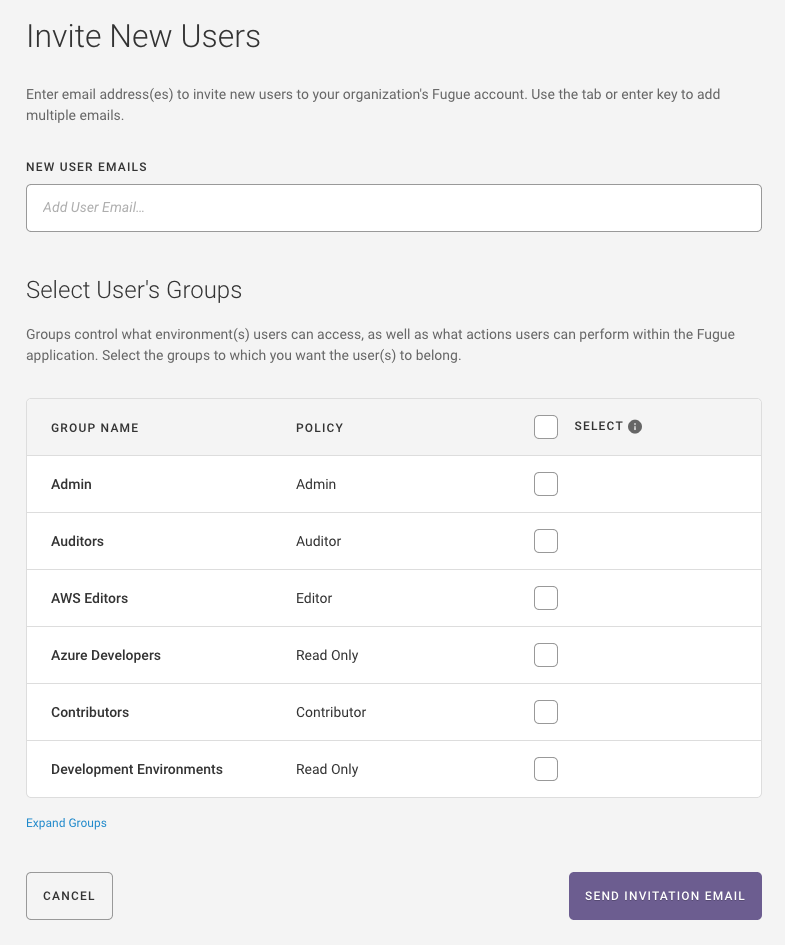
4. Click Send Invitation Email.
See User Management for more information on inviting and managing users.
How to Create an API Client and Assign it to Groups
In the API Clients page (accessible from the Settings link at the top right of the UI), create a new API Client and give it a name.
2. Select the group(s) you want the API Client to belong to. For more information, refer to How to Create a Group.
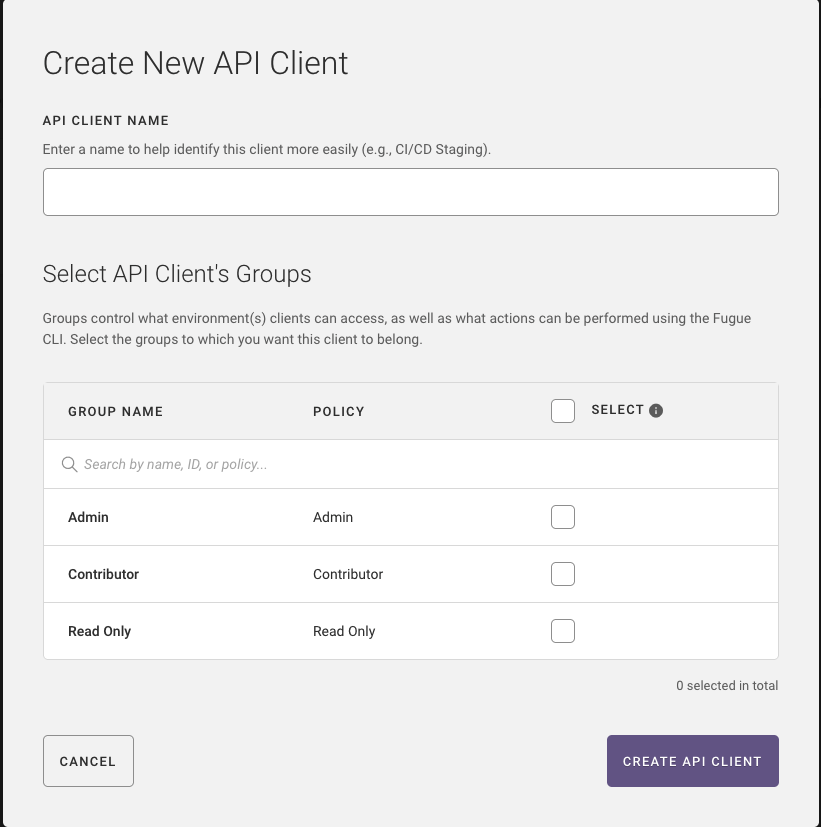
3. Click Create API Client.
4. Copy the Client ID and Client Secret and store it securely.
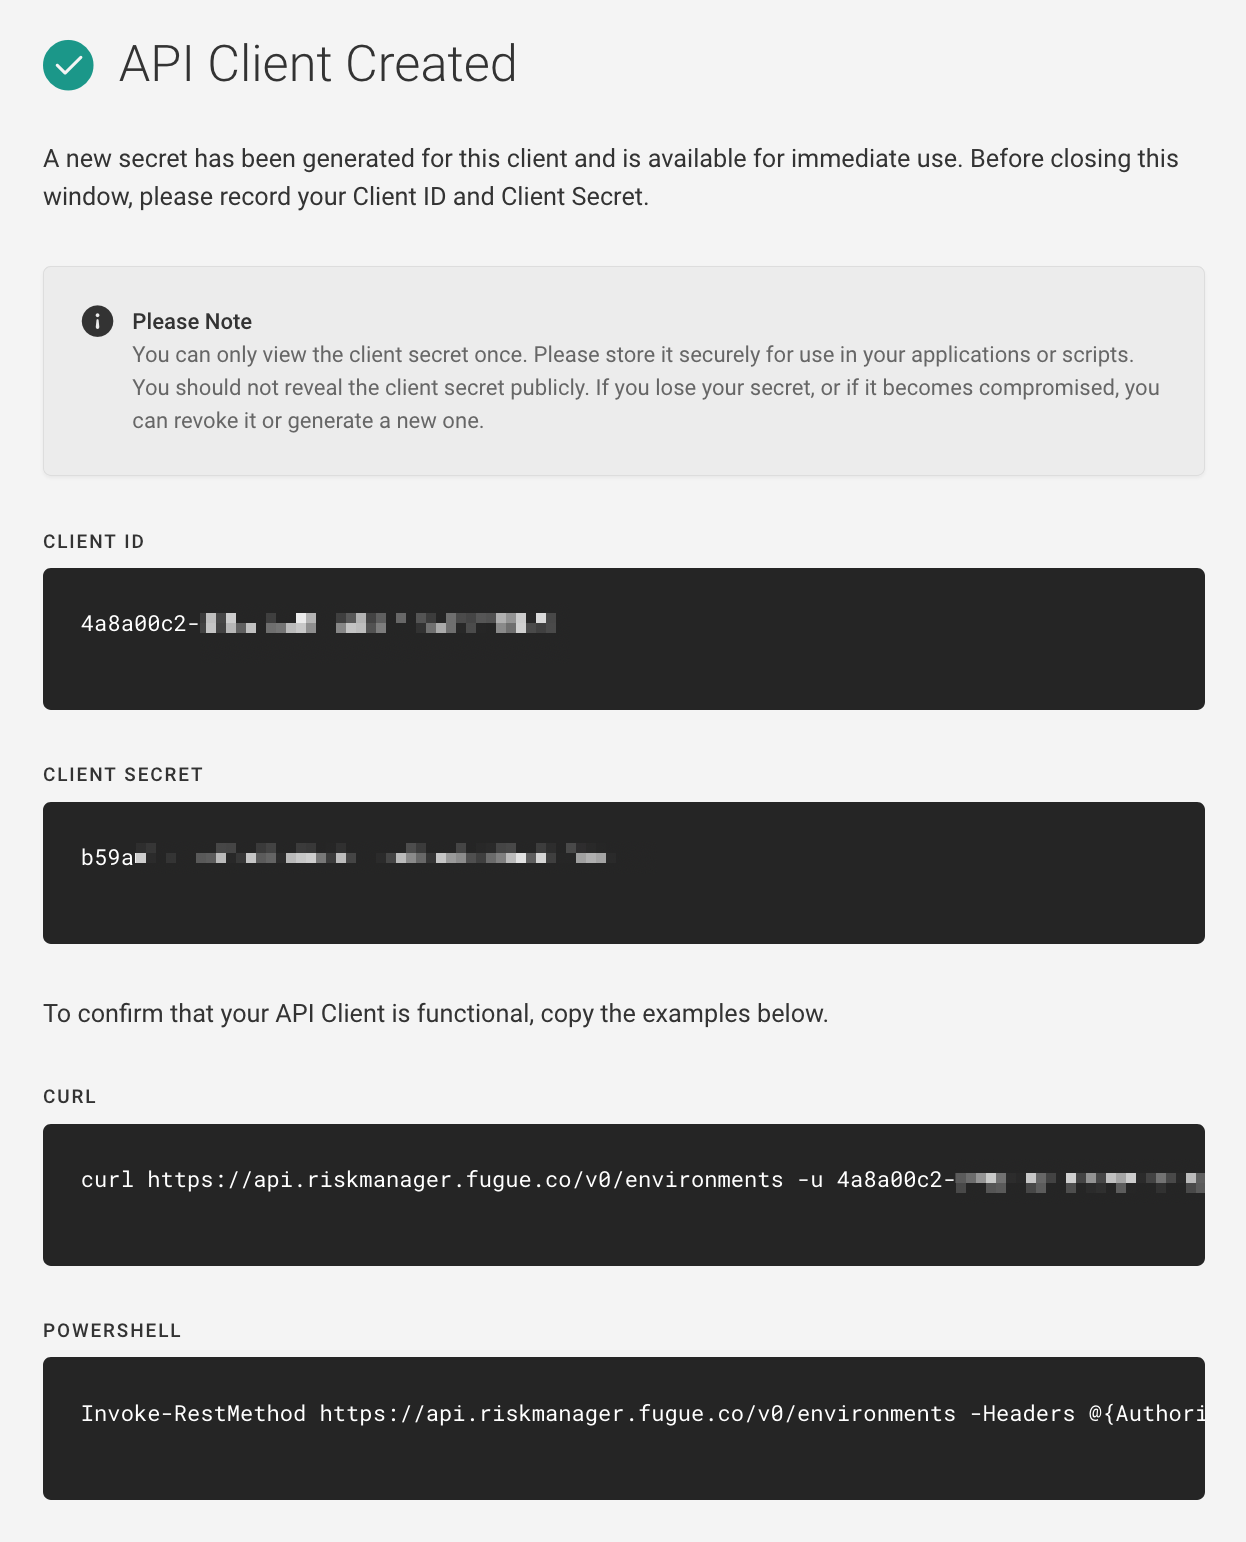
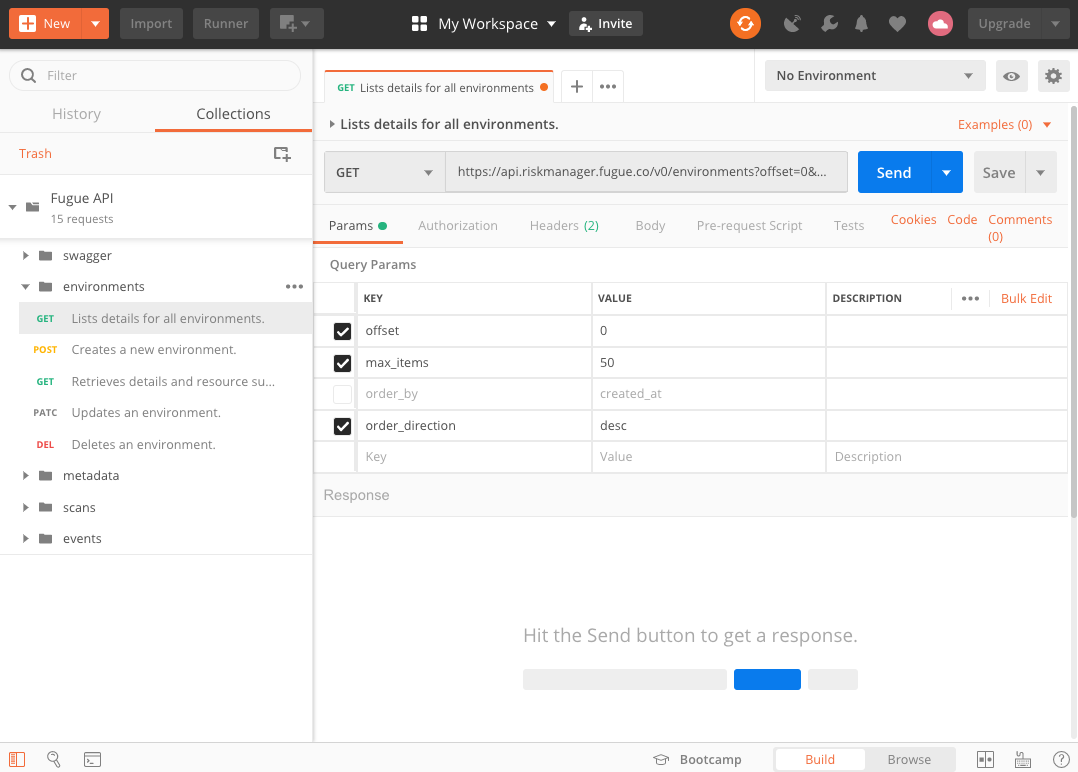
5. Use your preferred API tool to pass the Client ID and Secret in the Authorization HTTP header using Basic Auth.

6. Send an API request to the appropriate endpoint including any required parameters.
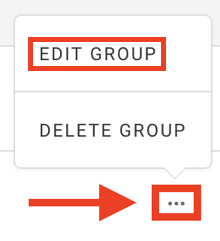
How to Edit Existing Groups
In the group row, select the ellipsis icon
...and choose Edit Group.
3. Select the environments this group can access.
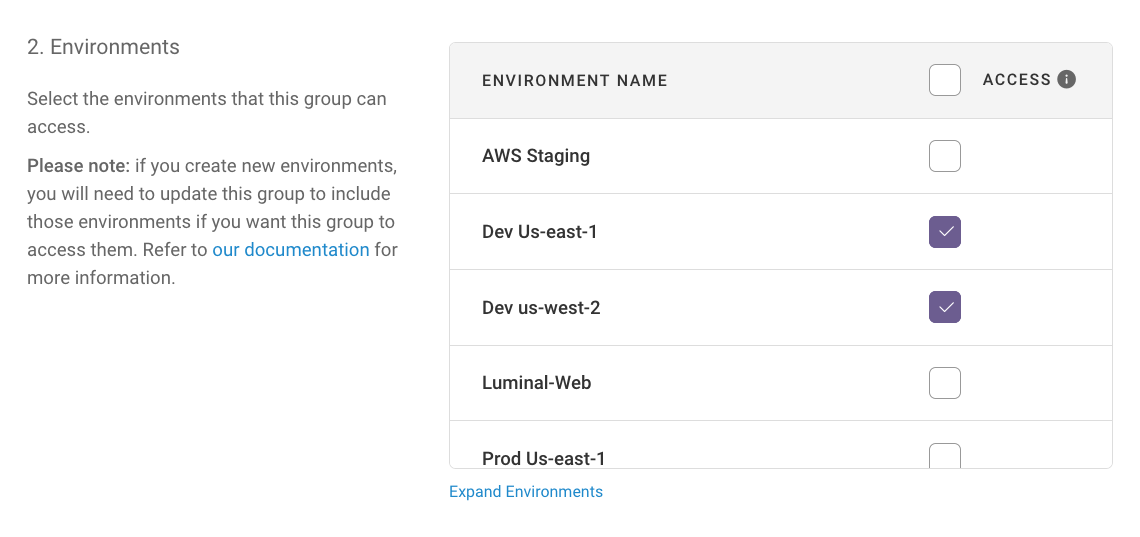
4. Click Update Group.
Note
If you create new environments, you will need to update this group to include those environments if you want this group to access them.
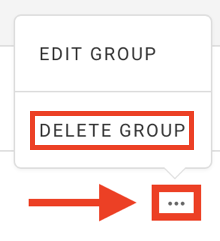
How to Delete Groups
In the group row, select the ellipsis icon
...and choose Delete Group.
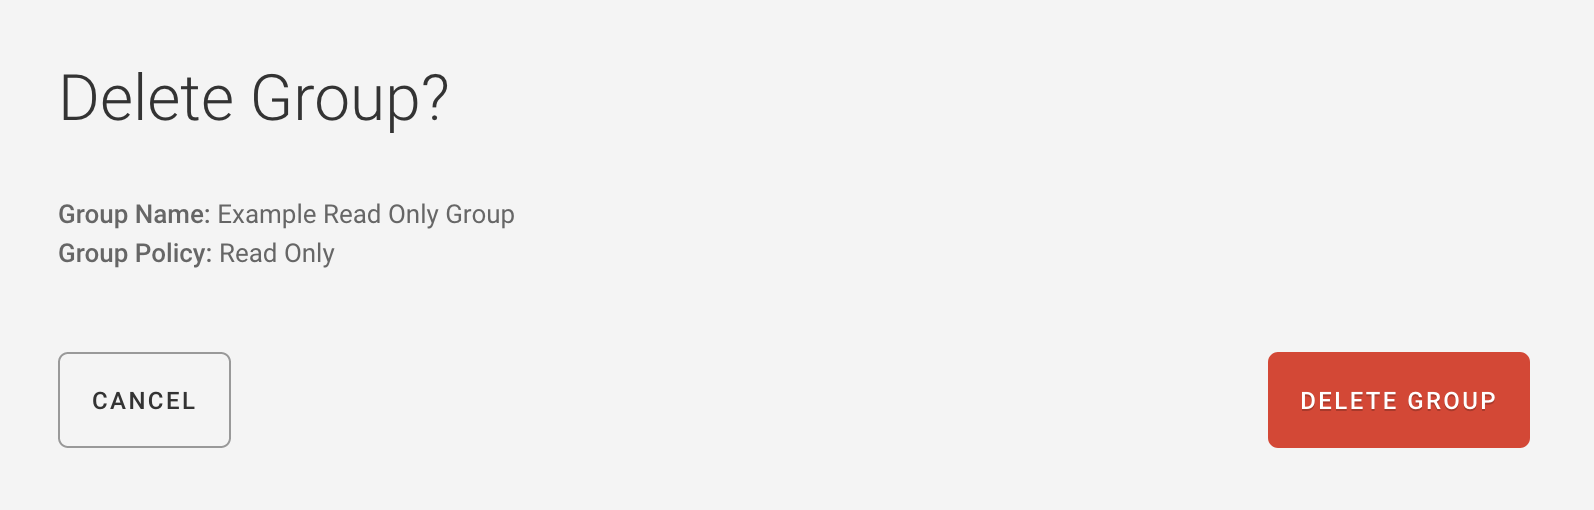
3. Select Delete Group.
Note
A group cannot be deleted if one or more users or API Clients belong to it. You must first move each user or API Client to a different group. Otherwise, you’ll see an “Unable to Delete Group” error:
Unable to Delete Group
Please reassign {user or API Client name} to a different group to delete this group. Go to Users Go to API Clients
More About User Management
For more information about managing users, see User Management.