Setup - Azure & Azure Government
Note
Looking for Azure Active Directory setup instructions? To get started with Fugue, see Setup - Azure Active Directory.
Looking for Amazon Web Services instructions? To get started with Fugue on AWS, see Setup - AWS & AWS GovCloud.
Looking for Google setup instructions? To get started with Fugue on Google Cloud Platform, see Setup - Google Cloud.
Looking for Repository setup instructions? To get started with Fugue on Repository, see Setup - Repository.
Ready to create a Fugue environment? An environment contains resources from a single AWS account, Azure subscription, Google project, or code repository – in this case, Azure or Azure Government. Fugue surveys the resource configuration in an environment and reports whether the infrastructure is compliant with a particular compliance standard.
Follow the same steps to create and configure Azure Government environments as you would Azure environments. When selecting a provider, such as during custom rule creation or when using the API, always select Azure.
Tip
In a hurry? For an even quicker setup guide, see Get Started in 5 Minutes.
To learn more about the basics of using Fugue, see Fugue 101.
Sign Up for Fugue
Before you can create an environment, you’ll need to sign up for a free account with Fugue. (You’ll start off with a free Enterprise trial, which gives you access to all of Fugue’s features; after 30 days, you’ll be transitioned to the free-forever Developer plan if you choose not to upgrade.)
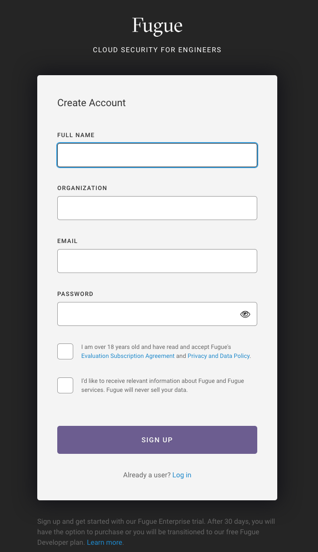
Once you’re all signed up and logged in, select the Define New Environment button:

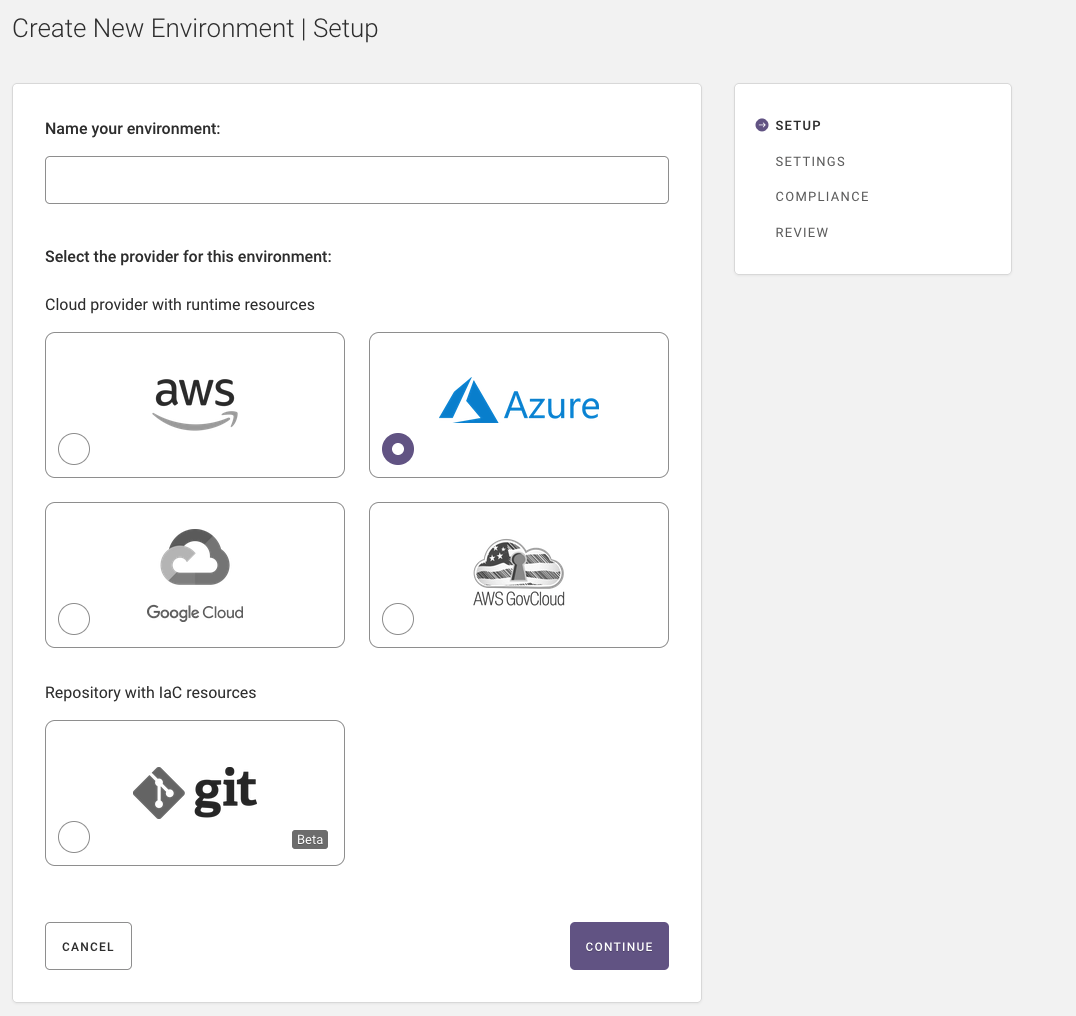
Step 1: Setup (Name, Provider)
Note
You must have at least one existing resource group in Azure in order to create an environment in Fugue.
In the first step of creating an environment, you name it and specify your provider – cloud or repository.
Name your environment.
Select Azure as the provider, whether you’re using Azure or Azure Government.
Select Continue.
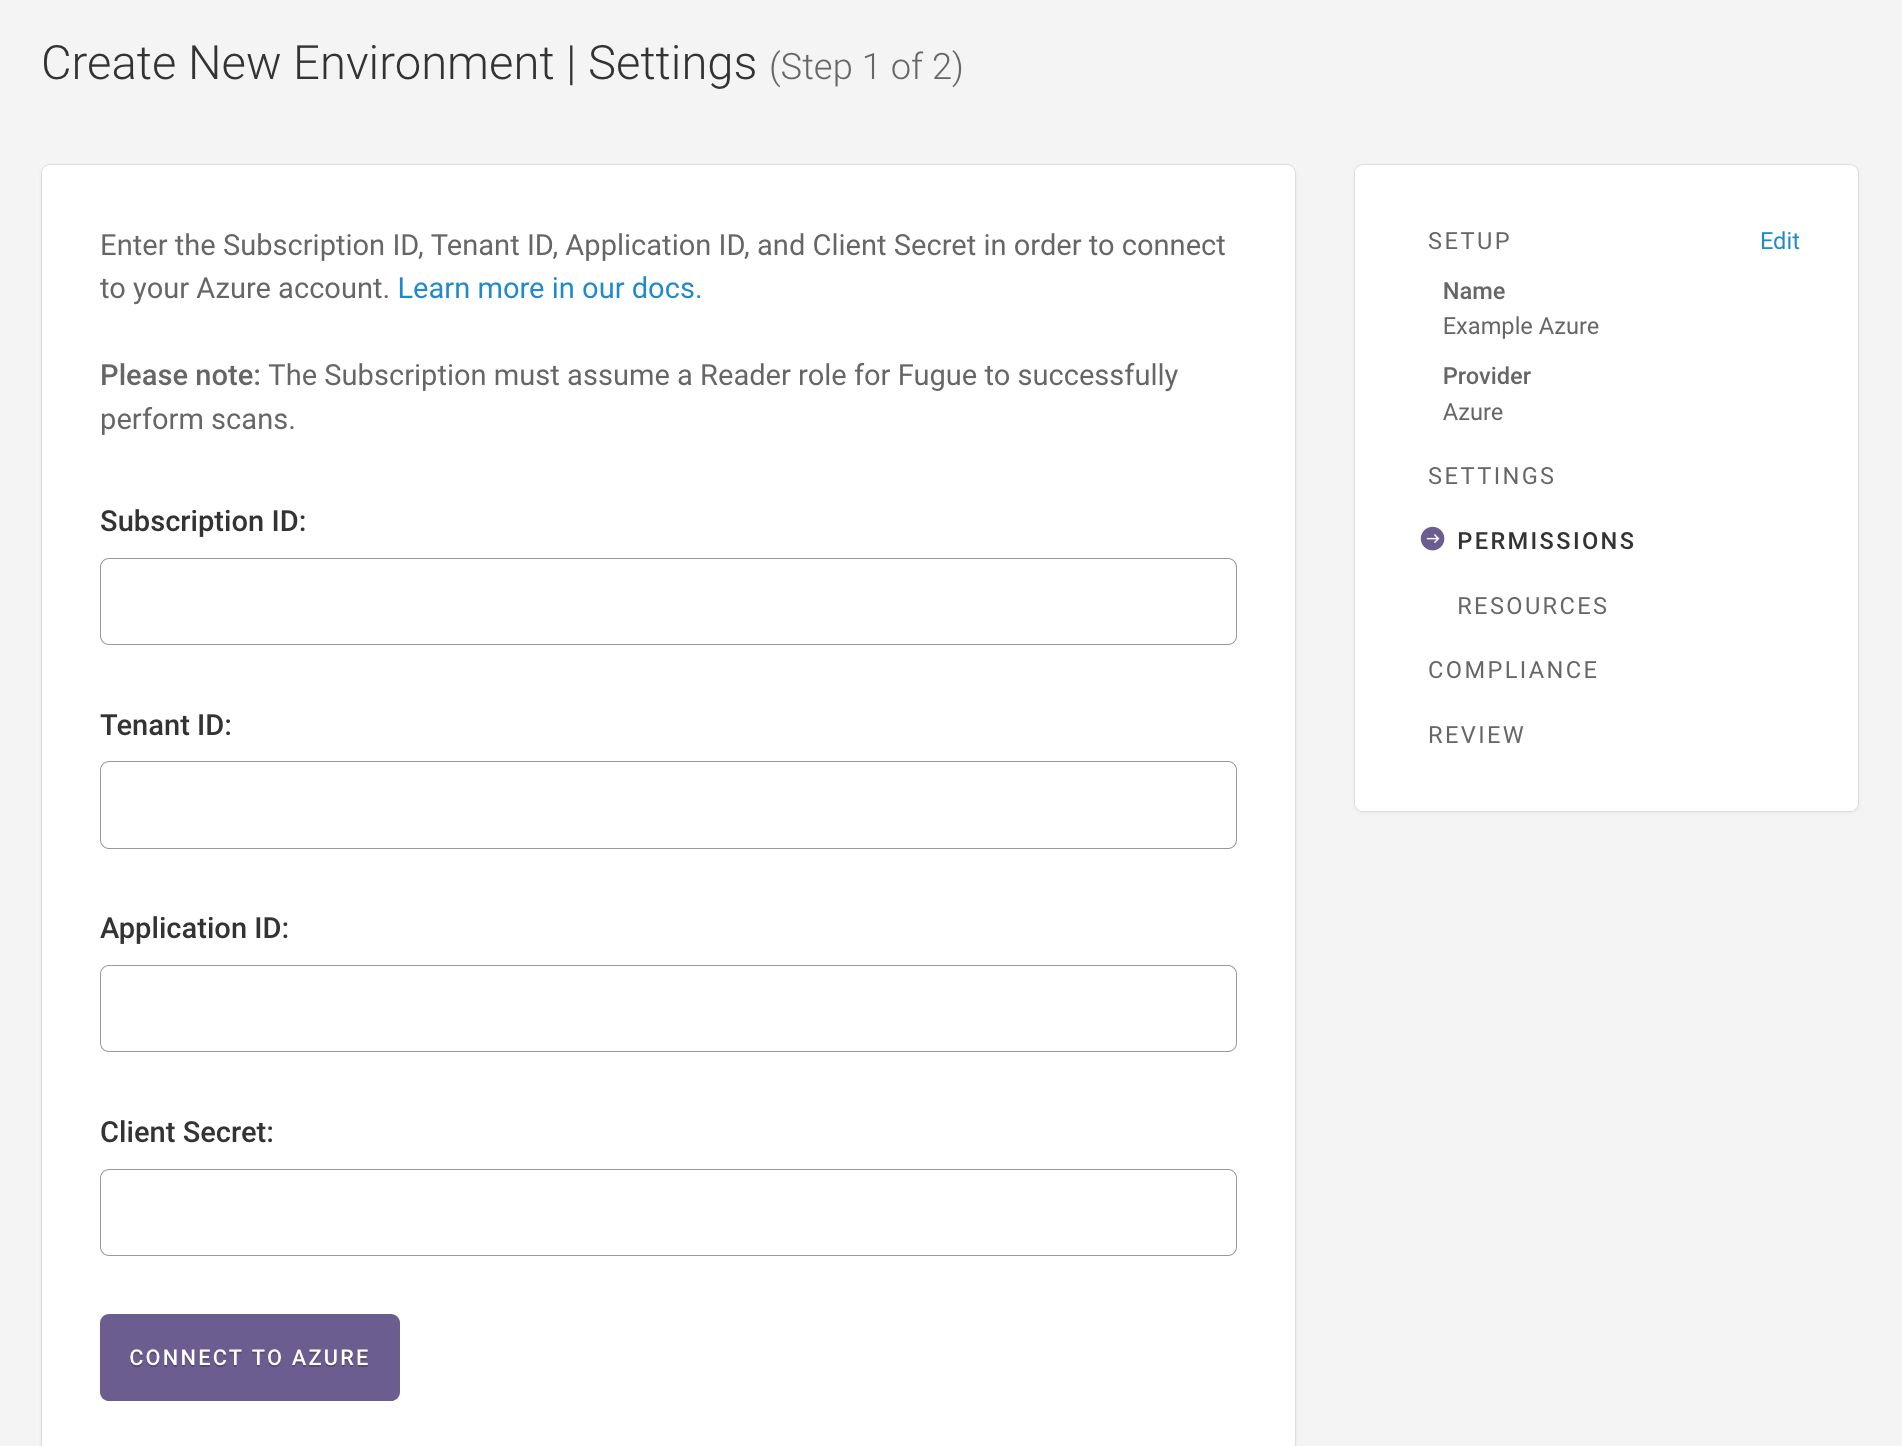
Step 2: Settings (Credentials, Resource Groups)
Note
If at any point you want to change something, you can select “Back” at the bottom of the page to return to the previous step, or “Edit” in the sidebar next to the desired step to return to that step.
Step 2 has two parts, which we’ll detail next:
2a. Configure Azure credentials so Fugue can scan your resource group configuration. This involves registering an application and client secret through the Azure Portal or Azure Government Portal.
2b. Select resource groups to scan.
Step 2a: Connect to Azure
Before Fugue can connect to your Azure subscription and scan your infrastructure, you’ll need to provide four pieces of information:
- Subscription ID
The ID for your trial or paid subscription to Microsoft Azure. To find your subscription ID, go to All services > Subscriptions > Subscription ID (or use the Azure Government link).
- Tenant ID (directory ID)
The ID of your specific Azure Active Directory instance. To find your tenant ID, log into the Azure Portal and navigate to Azure Active Directory > Properties > Directory ID (or use the Azure Government link).
- Application ID (client ID)
The ID for the Azure Active Directory application you register for Fugue. You’ll create this in the next step.
- Client secret
The secret string Fugue uses to authenticate with Azure. You’ll also create this in the next step.
Create Azure Active Directory Application
Note
We recommend only activating Active Directory support for the credentials associated with a single Fugue environment. Your Active Directory resources will show up in this environment and if you add Active Directory permissions in other environments, the resources will be duplicated. Refer to Assign the Azure AD Directory Readers Role (for Active Directory resources) for more information.
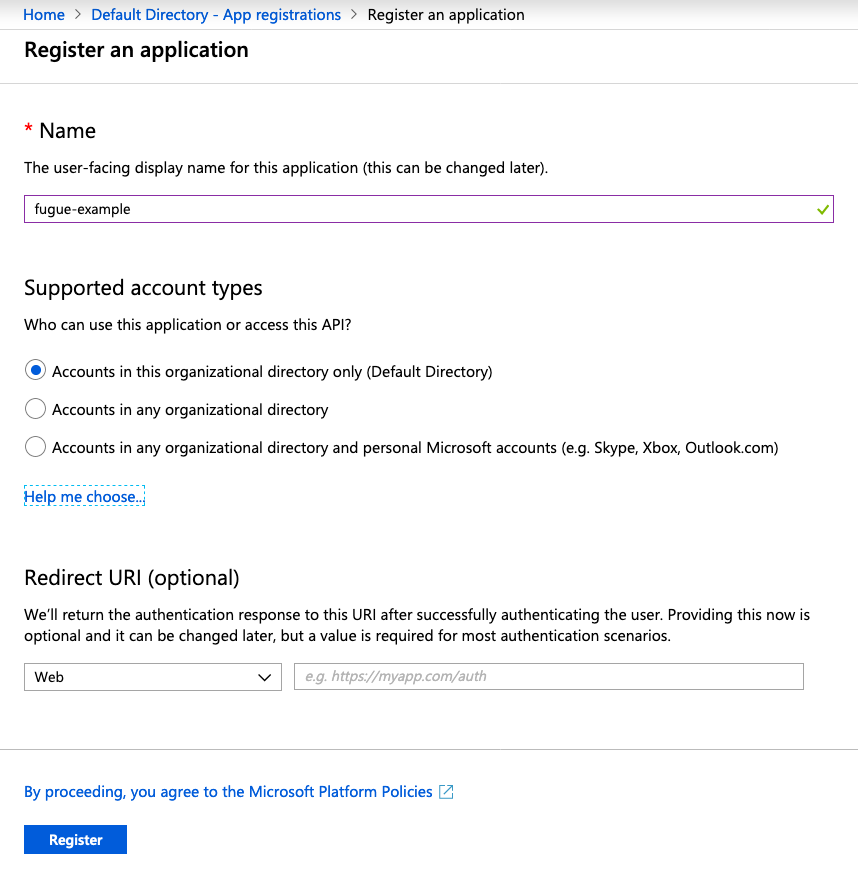
To obtain an application ID (client ID) and client secret, you’ll need to create an Azure Active Directory (AD) application and service principal, assign it an RBAC role, and then generate a secret. This gives Fugue the permissions required to scan your selected resource groups.
In the Azure Portal, navigate to Azure Active Directory > App registrations (or use the Azure Government link), then select the “New registration” button.
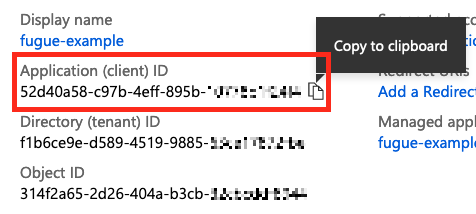
Enter a name for the AD application – we’ve called ours fugue-example
in the image below – and then ensure supported account types is set to
“Accounts in this organizational directory only.” You can leave the
“Redirect URI” field blank. Then, click the “Register” button.
After Azure registers the application and creates the service principal, you can copy the application ID and enter it into the Fugue environment setup:
Assign an RBAC Role
Next, you’ll need to assign the service principal an RBAC role. You can scope the role to your entire subscription, a specific resource group, or an individual resource. If you intend to use Fugue to scan more than one resource group, it’s simplest to give the application access at the subscription level, but go with whatever works best for your use case.
To assign your service principal a role at the subscription level, navigate to All services > Subscriptions > Subscription ID (or use the Azure Government link) and select your subscription. Then, select the Access Control (IAM) link and click the “Add” button, then “Add role assignment”:
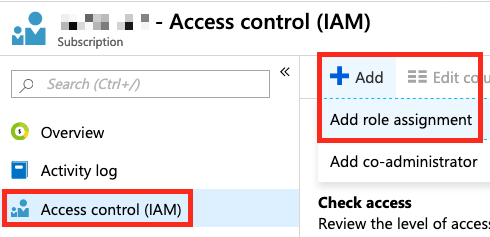
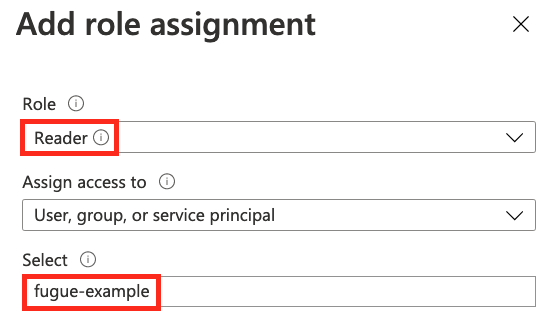
Select the Reader role. Leave the “Assign access to” field as is and search for the name of your AD application in the “Select” field, then select the “Save” button.
Generate a Client Secret
Now that you’ve created the AD application and set up the service principal, you can generate a client secret. Return to Azure Active Directory > App registrations (or use the Azure Government link) and select the application you just registered, then select the Certificates & secrets link. Click the “New client secret” button and enter a description for your client secret and set an expiration date, then select “Add.” You can then copy the value to the Fugue environment setup:

Warning
The Secret ID is not the value you copy and paste into the Client Secret field within Fugue. Use the Value field.
Back in the Fugue environment setup, select the “Connect to Azure” button. You should see a message confirming that the connection was successful:

You can select “Undo” if you need Fugue to connect again and refresh the list of resource groups. Note that when you select “Undo,” Fugue clears all of the credential fields.
Step 2b: Select Resource Groups
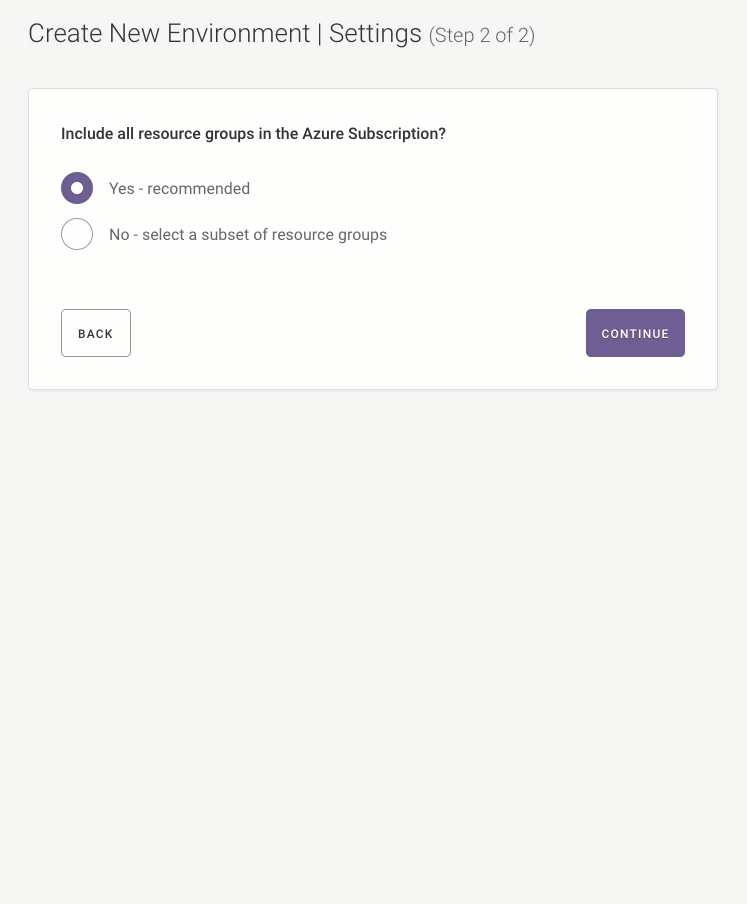
Now that Fugue has connected to your Azure subscription, you may specify the resource groups you want Fugue to scan.
If you’d like Fugue to scan the infrastructure configuration of all resource groups in your Azure subscription, select Yes for “Include all resource groups?” Note that after the environment is created, Fugue will automatically detect new resource groups and add them to your environment.
If you’d prefer to select the resource group(s) Fugue should scan, you can pick “No - select a subset of resource groups” and check the box for the desired resource groups.
If you want to select a resource group you created in Azure after connecting but before finalizing the environment, you can refresh the list of available resource groups by selecting “Undo” and re-entering the connection information.
Note
To change the selected resource groups after the environment has been created, you must use the Fugue API. See How To: Add or Remove Azure Resource Groups for details.
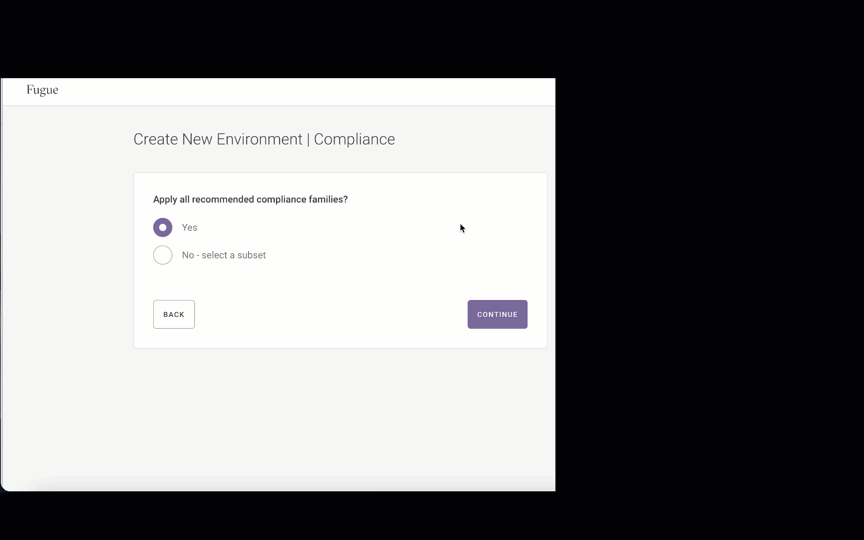
Step 3: Select Compliance Libraries
If you’d like Fugue to evaluate your infrastructure configuration for all compliance standards, ensure “Yes” is selected.
If you’d prefer to select the compliance families yourself, click No - select a subset.
Fugue supports the following compliance families for Azure environments:
CIS Azure (v1.1.0)
CIS Azure (v1.3.0)
CIS Controls (v7.1)
CSA CCM (v3.0.1)
GDPR (v2016)
HIPAA (v2013)
ISO 27001 (v2013)
NIST 800-53 (vRev4)
PCI DSS (v3.2.1)
SOC 2 (v2017)
Step 4: Review Environment Details
Review the details for your environment, including environment name, subscription/tenant/application IDs, compliance standards, and resource groups.
If anything needs to be changed, click Edit next to the appropriate step, as highlighted below.

3. If everything looks good, select the Approve and Begin Scan button. Fugue will create your environment and start to scan your infrastructure.
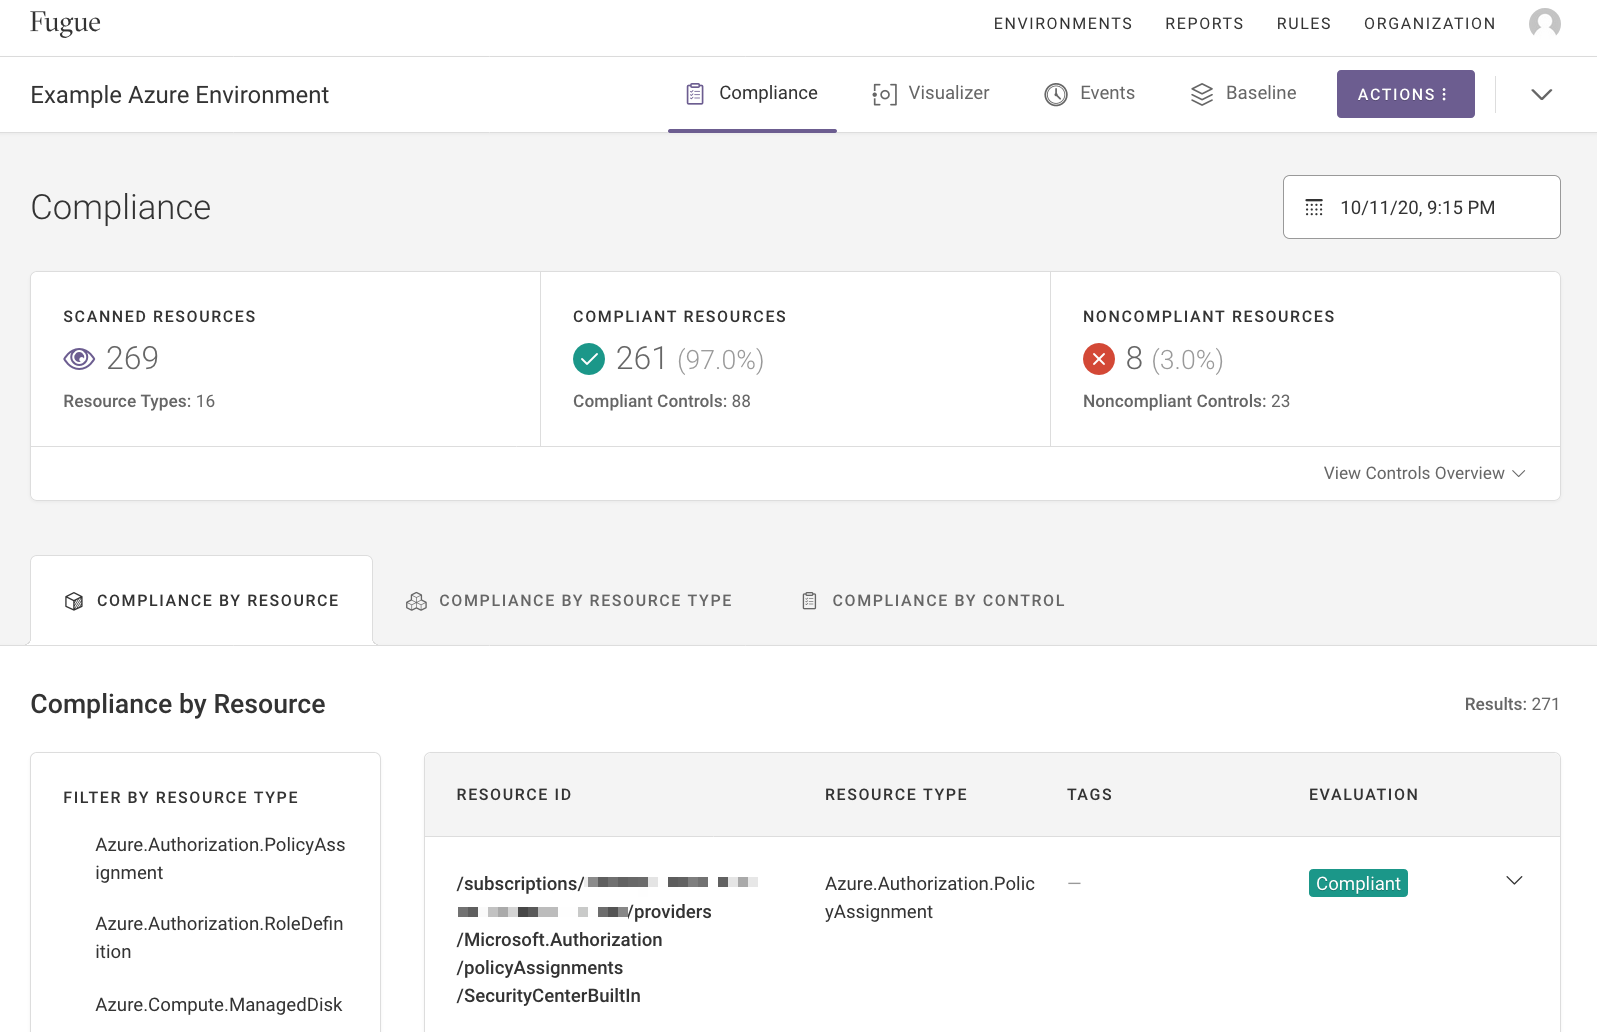
When the scan is complete, Fugue brings you to your environment’s dashboard, where you can see your compliance state.
Congratulations! You’ve just created an Azure environment with Fugue.
What’s Next?
Fugue will continue to scan the resource configuration in your environment at regular intervals (and on demand). This is how Fugue detects compliance violations in your infrastructure.
Now that you’ve created an environment, learn how to configure it further in Environment Configuration. If you’d like to learn more about checking compliance state, see Compliance. Or, check out the visualizer for an interactive diagram of your cloud infrastructure.