Managing Rules - UI
Note
For CLI instructions, see Managing Custom Rules - CLI.
For API instructions, see Managing Custom Rules - API.
Just looking for info on writing custom rules? See Writing Custom Rules.
Fugue’s Rules page allows you to create, update, and delete custom rules. You can also waive and disable/enable built-in and custom rules.
Viewing Custom Rules
You can view a list of custom rules on the Rules page, accessible from the upper-right corner of the UI. The Rules page displays all Fugue rules and custom rules for an organization. To view only custom rules, enter the search term category:custom.
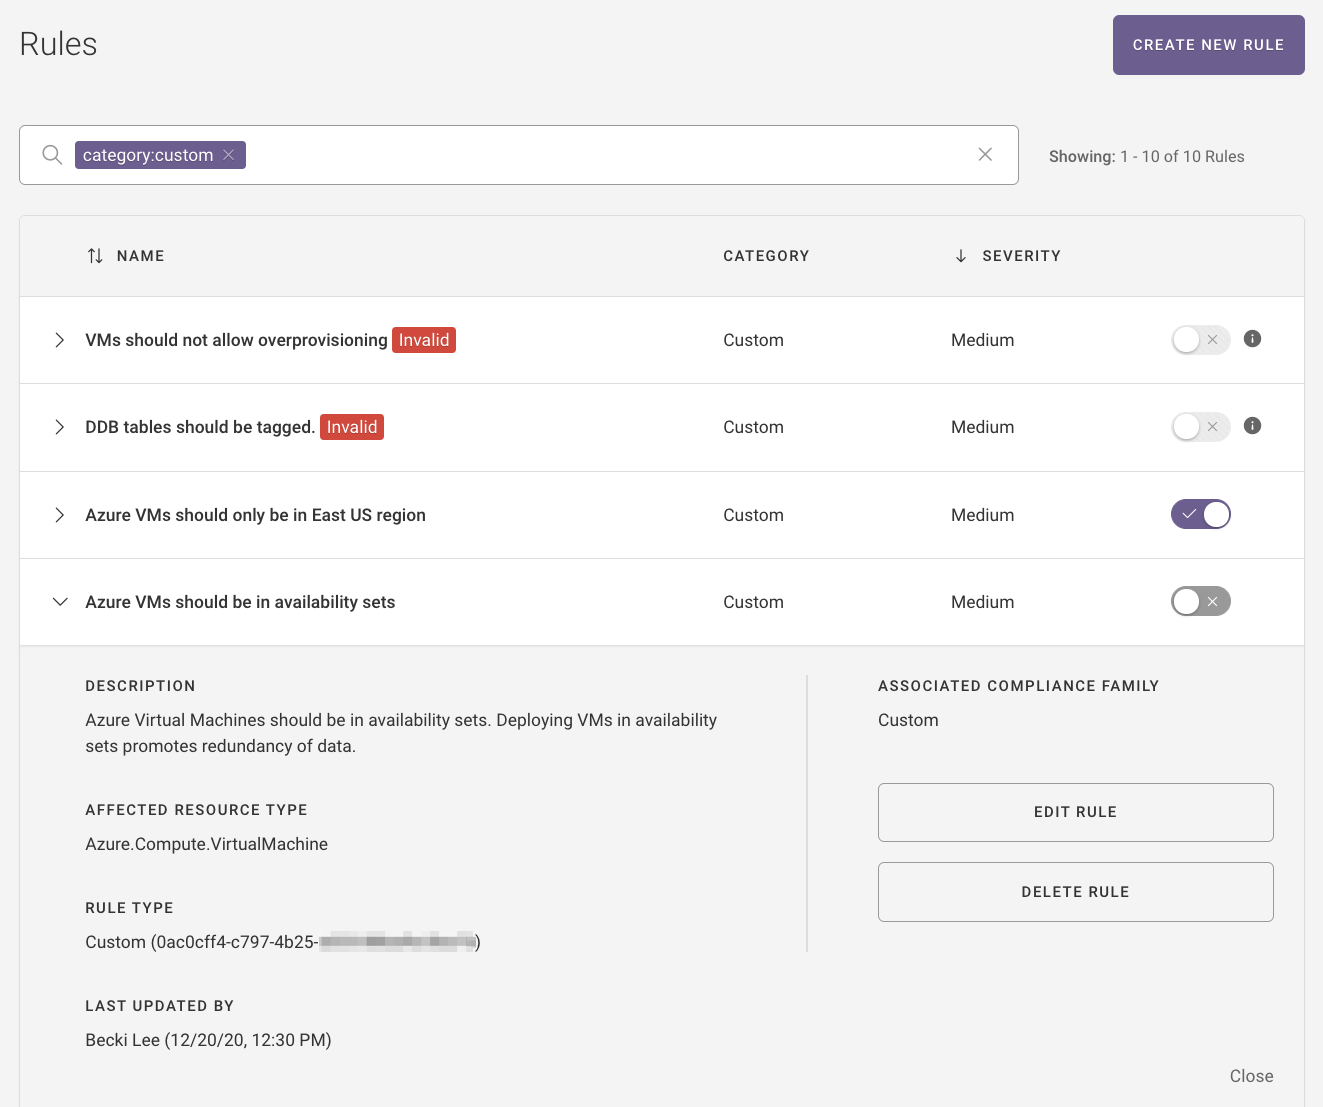
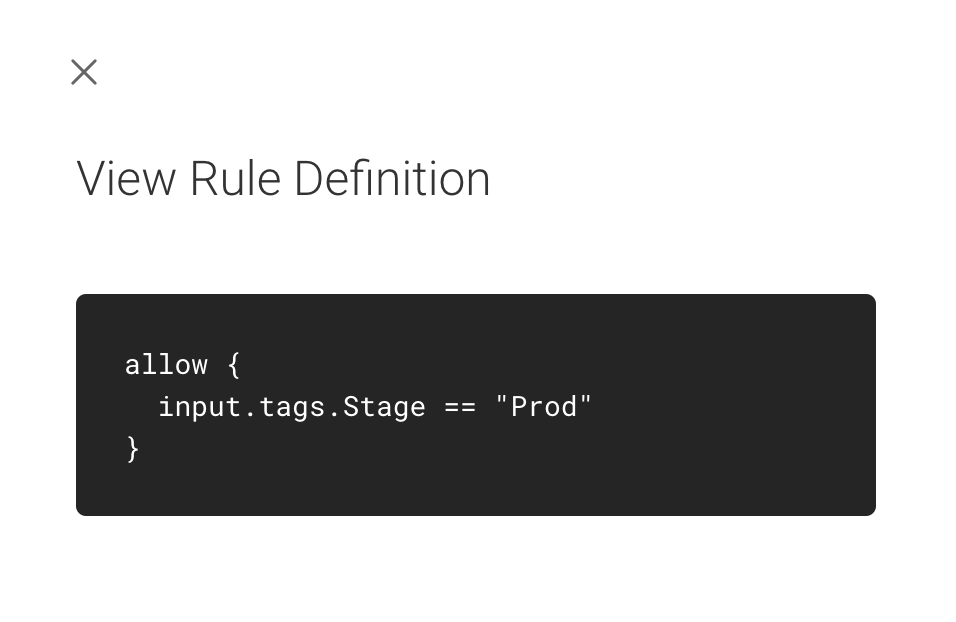
Additionally, users can view the rule definition for Custom rules by selecting ... > View Rule Definition.
For more information about navigating the custom rules page, including tips on searching and sorting, see Navigating the Rules Page.
Creating Custom Rules - UI
1. Select Rules in the top right of the UI and click the Create New Rule button. The Create New Rule page displays, as shown below.
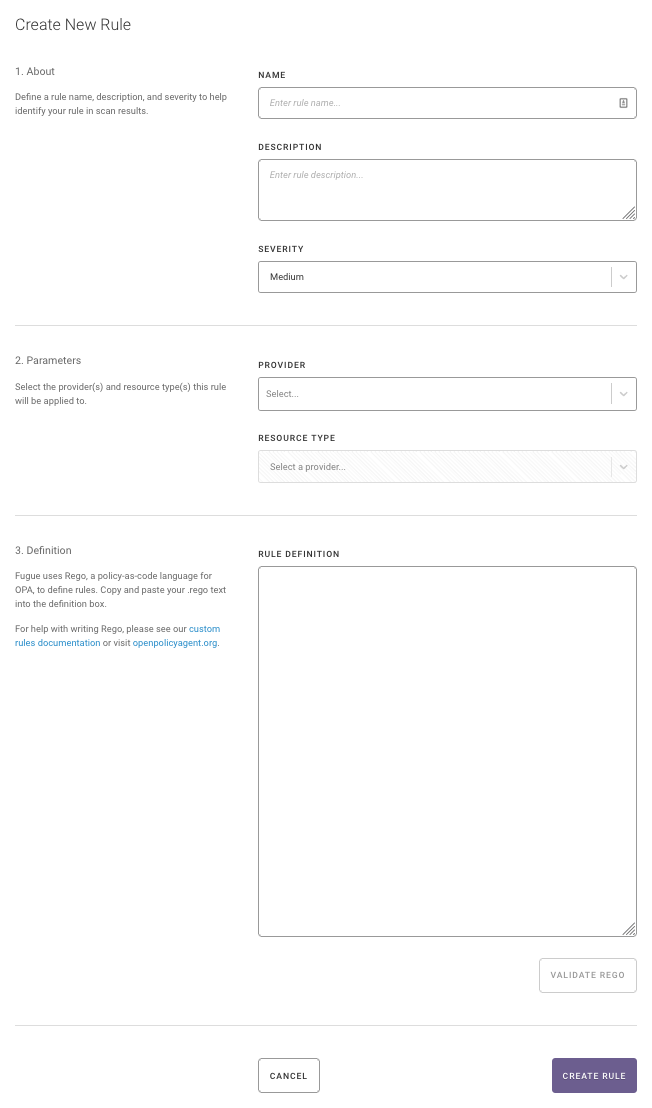
2. Enter a name for your rule. The name entered here displays in the Control field on the Compliance by Control page for your environments. Refer to Viewing Compliance Results for more information.
3. Enter a description for your rule. The description entered here displays on the Description field on the Compliance By Control page for your environments. Refer to Viewing Compliance Results for more information.
4. Select a severity level for your rule. The severity entered here displays in the Severity field on the Compliance by Resource page for your environments.
5. Select one or more providers. The selected provider determines the environments this rule applies to, and the resource types that display from the Resource Types drop-down. Note: For Azure or Azure Government, select Azure.
6. Select the Resource Type from the drop-down. This is the resource type that you want your custom rule to evaluate. See Custom Rules Reference for more information.
Note
If you selected the Repository provider or multiple providers, the resource type is automatically set to Defined in Code. The Rego code you enter in step 7 must contain a resource_type declaration; see Custom Rules Reference for more information.
7. In the rule definition, enter your Rego. Refer to Writing Custom Rules, Simple Custom Rules, and Advanced Custom Rules for more information.
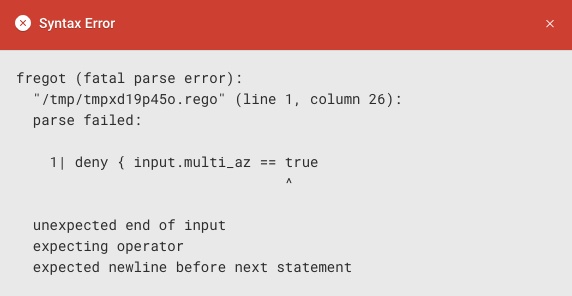
8. Optionally, click the Validate Rego button. If your rule has invalid syntax, an error displays, similar to what is shown below. Fix the invalid syntax or you can choose to save your rule and edit it later.
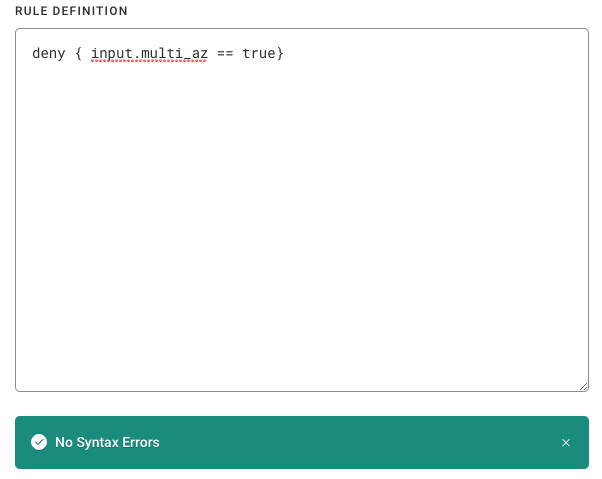
If the rule has valid syntax, it displays similar to what is shown below.
9. Click the Create Rule button. When created, a custom rule is set to an “enabled” status if the rule has valid syntax. On subsequent scans it is automatically applied to all environments where the rule family is enabled.
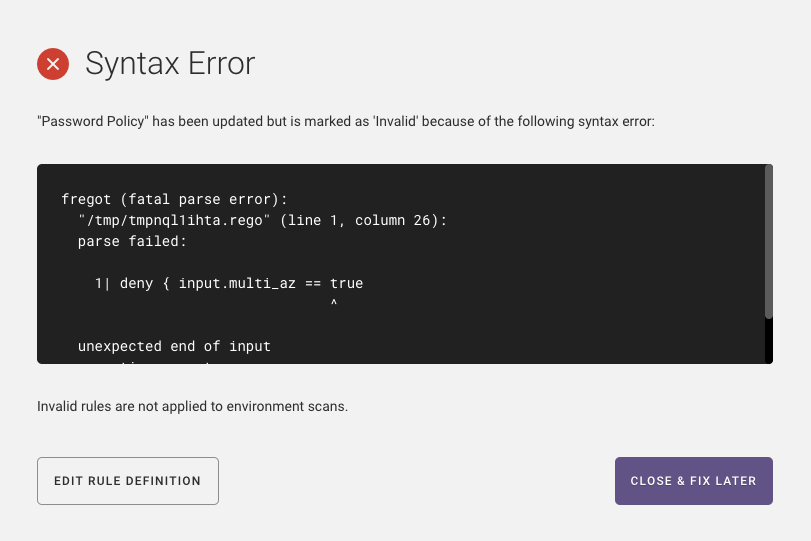
If the rule contains invalid syntax, the following error modal displays similar to what is shown below. You can chose to fix the rule now or later. Custom rules that contain invalid syntax are not automatically run against your environments until syntax errors are fixed and the rule is set to an “enabled” status.
Note
You can manually kick off a scan for an environment to see the result of your custom rule against the specified environment. Refer to the FAQ for more information.
Example Rules
For examples of simple and advanced custom rules, see our GitHub repo.
Modifying and Deleting Custom Rules - UI
To edit or delete a custom rule in the UI, navigate to the Rules page and select the vertical ellipsis next to the rule you want to edit or delete. (You can search for the rule using keywords or a key:value syntax.)
Then, select Edit Rule or Delete Rule:

All fields are editable. After you finish editing a rule, select Update Rule.
Note
If you delete or disable a custom rule, the rule is not removed from an environment until after the next scan. The deleted or disabled rule continues to display in the environment’s compliance tabs and the pass/fail results count toward your compliance posture. After the next scan, the rule is removed from the environment and results are not counted toward your compliance posture.
Viewing Compliance Results - UI
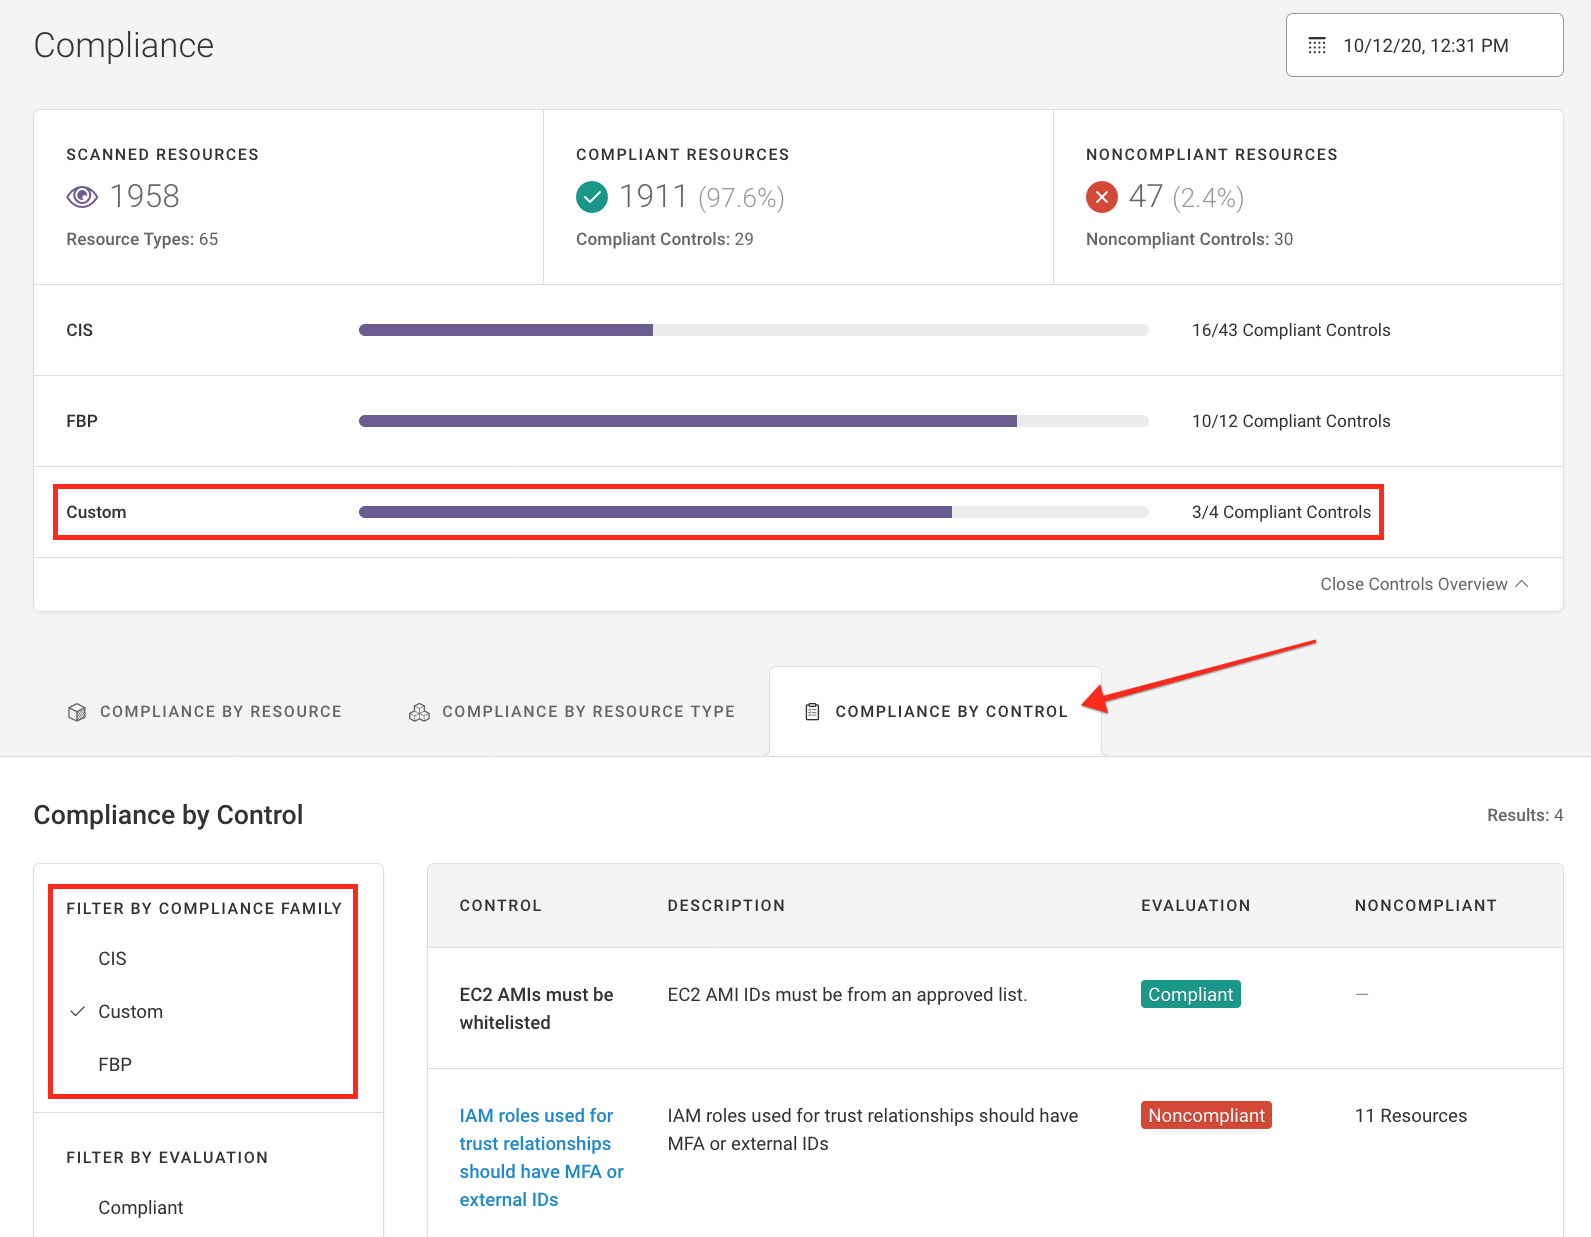
After a scheduled scan runs or is kicked off manually, navigate to the Compliance by Control tab. The Custom compliance family displays if the family is enabled for the environment. You can filter by Custom to only view the results for your custom rule(s).
Additionally, the three compliance tabs allow you to take a deeper dive into why your custom rule is passing or failing.
Compliance by Resource - UI
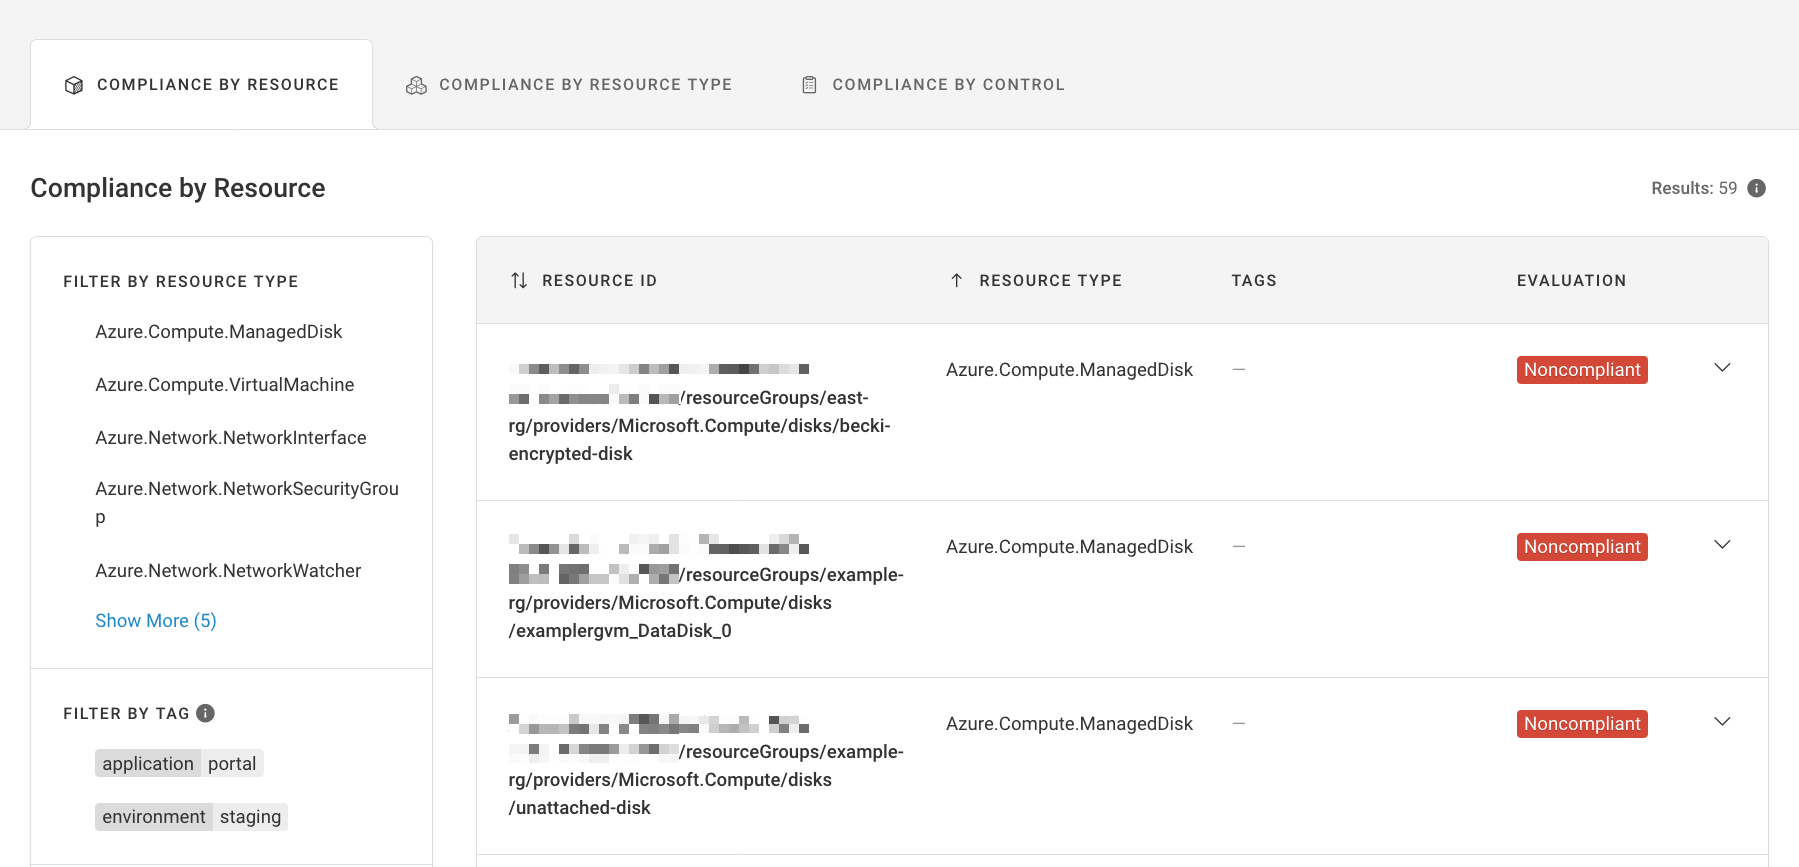
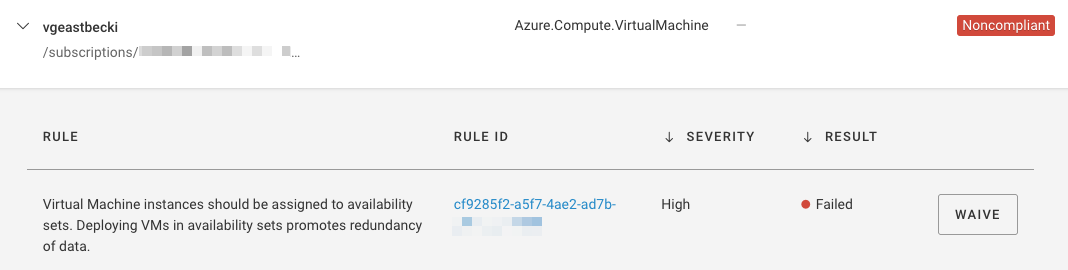
Custom rules display as shown below on the Compliance by Resource tab.
Clicking on a resource displays as shown below. The Rule column shows the description you entered on the Create Custom Rule Page and the Rule ID column shows the custom rule UUID.
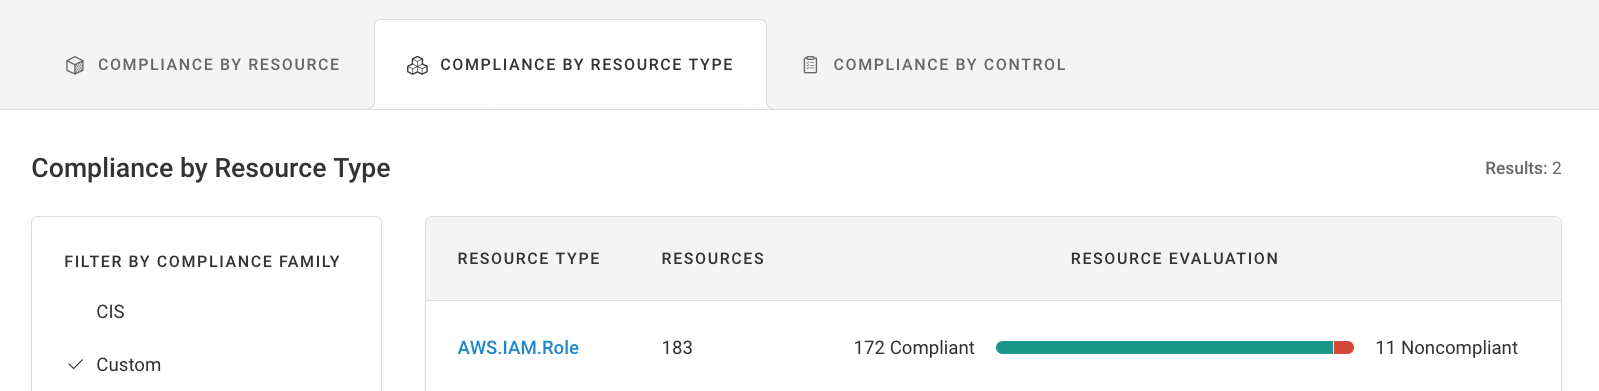
Compliance by Resource Type - UI
Custom rules display as shown below on the Compliance by Resource Type tab.
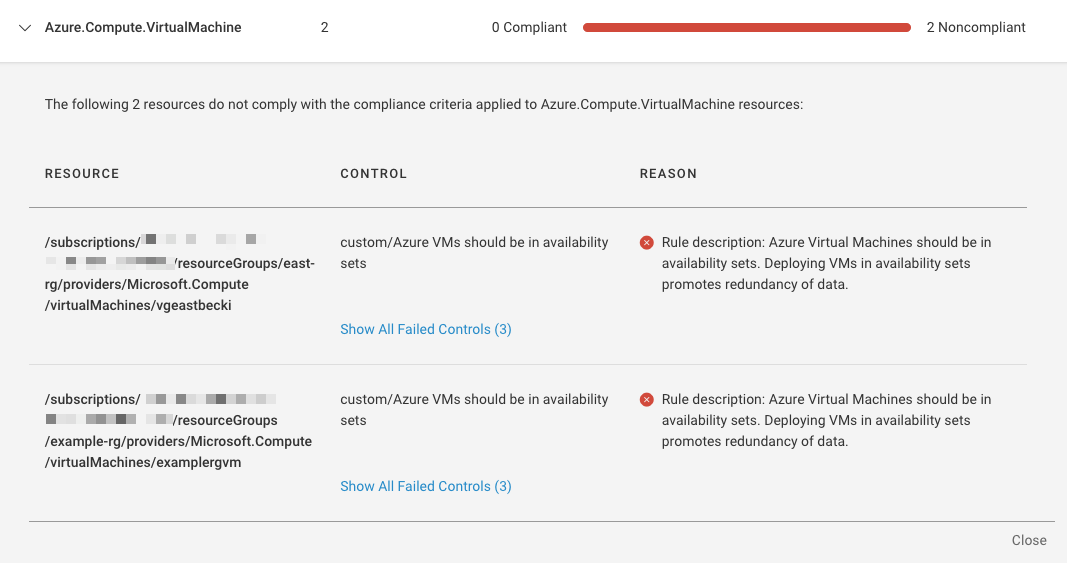
Clicking on a noncompliant resource type displays as shown below. The name you entered for the rule on the Create Custom Rule page displays in the Control column and the description you entered displays in the Reason column.
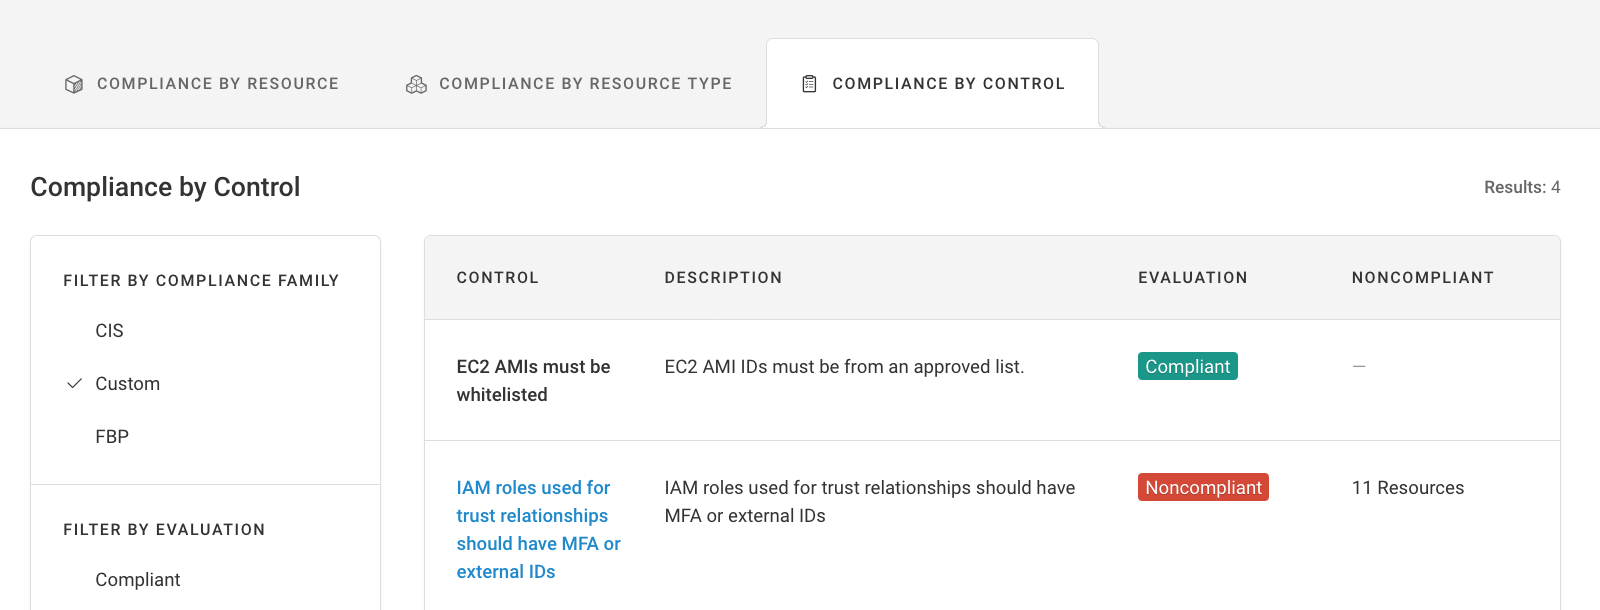
Compliance by Control - UI
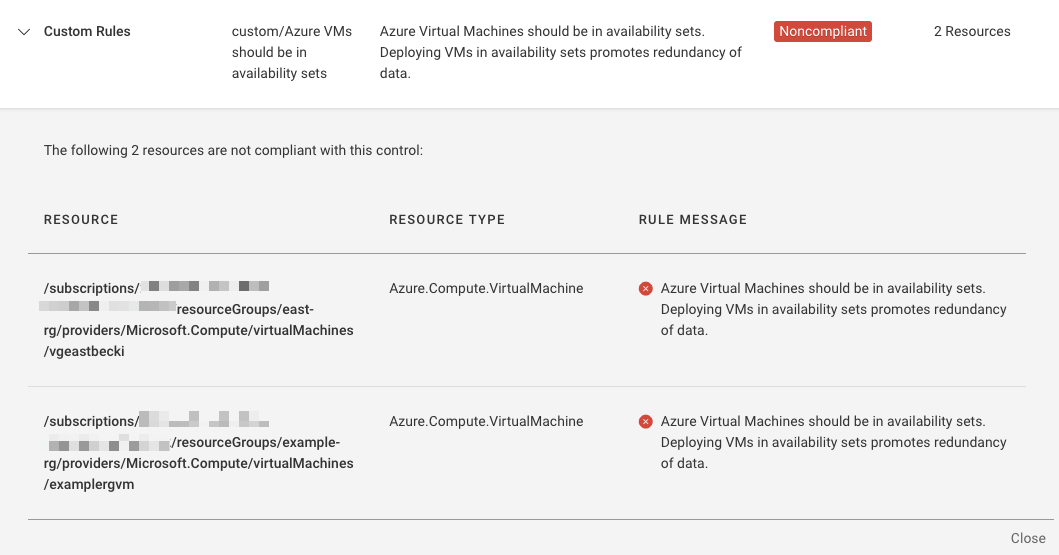
Custom rules display as shown below. The name you entered for the rule on the Create Custom Rule page displays in the Control column and the description you entered displays in the Description column.
Clicking on a failed rule displays as shown below. The description is in the Rule Message column.
Waiving Custom Rules - UI
You can waive a custom rule for one or more resources in a single environment the same way you’d waive any other rule. See How to Waive a Rule for instructions and Waiving Rules to learn more about waivers.
Disabling and Enabling Custom Rules - UI
You can disable or enable a custom rule for all applicable resources in all environments with the Custom family selected. To do so, simply select the rule on the Rules page and toggle the switch at the end of the row.
For more details, see Enabling and Disabling Rules.
Note
If you delete or disable a custom rule, the rule is not removed from an environment until after the next scan. The deleted or disabled rule continues to display in the environment’s compliance tabs and the pass/fail results count toward your compliance posture. After the next scan, the rule is removed from the environment and results are not counted toward your compliance posture.
Creating and Editing Custom Families on the Rules Page - UI
You can create or edit custom families on the Rules page or the Families page. You can also decide if you want the custom family to belong to the recommended compliance families list.